Tips & Lessons Menu
Design & Color

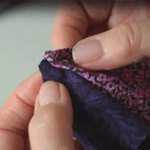
Hand Piecing

Hand Quilting
Sewing Tips

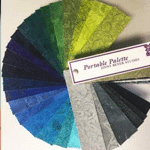
Terrific Tools

Working with
Border Print Fabrics
Sewing Tips
A Solution for “Just-Too-Narrow” Quilt Backing Fabric
When your quilt is just wider than your backing fabric, we’ve got a solution! Click to expand.
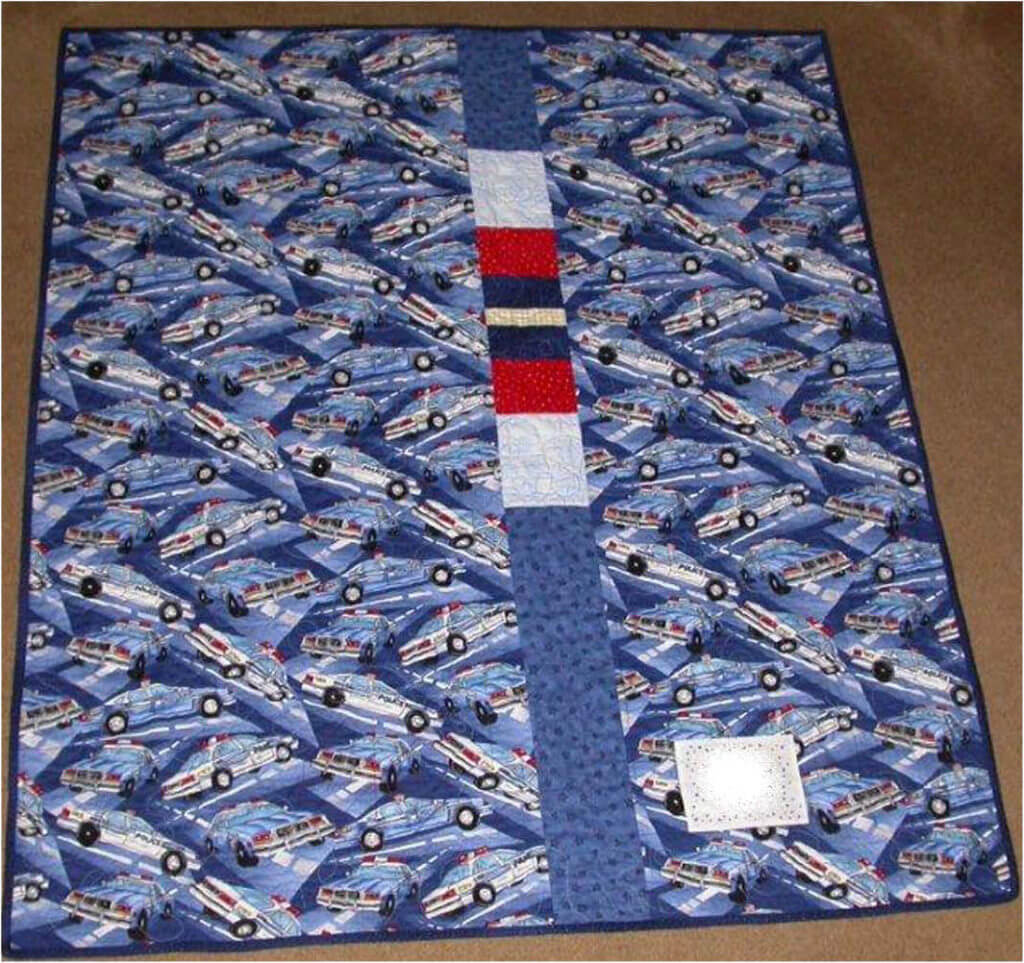
Most quilters are frugal when it comes to backing their quilts. Of course, it’s important to use the same quality fabric as you used on the front. But it’s frustrating when your quilt is just a little wider than your backing fabric. That’s where creativity comes in.
You can always make your backing wider by adding a panel of contrasting or co-ordinating fabric or orphaned blocks.
This quilter added a panel of pieced fabrics left over from the front of the quilt.

Orphan blocks were the salvation here . . . and now the quilt is virtually two-sided. The quilter used nine left over blocks, then framed them in a coordinating fabric.
One of these options is bound to work for you!

Binding Quilted Projects
We’ve gathered together some of our favorite techiques for binding quilted projects with downloadable information and some great videos, too. Click to expand.
There are various ways to finish off the edge of a quilt. Jinny’s favorite method is to add a narrow binding in either the same fabric as that which is at the outer edge of the quilt, or with a fabric that coordinates with the fabric around the edge.
Double-fold binding can be made from either straight-grain or bias strips. Jinny’s preference is bias binding because she feels it provides a smoother finished edge. It is also more durable because straight-grain binding is folded along one continuous thread, creating a weakness that can cause it to wear and fray much more quickly.
To make double-fold binding, cut strips of fabric four times the finished width of the binding, plus the seam allowance. Jinny usually works with 2-inch-wide strips.

Turning Binding to the Front of a Quilt
When Jinny has used a border print on the outside of a quilt, she likes to sew the binding to the back of the quilt and turn the binding to the front, the opposite of what most quilters do. This lets her fine-tune exactly where the binding is stitched down on the front so that she doesn’t cover up any design elements from the border print.
For detailed instructions on how Jinny adds binding to a quilt, download her binding reference sheet,
Binding a Quilt the Jinny Beyer Way.

Binding Odd Angles
If you are binding a quilted item with odd angles (such as a table runner with pointed ends), Marci Baker has a terrific video showing you how to deal with these less-common angles. You can find the video at the link below

Joining Binding Ends
Getting a smooth, invisible join of the two ends of the binding can be a challenge. Here are two simple techniques that the Studio staff and our customers love.
This is the technique that Studio staffer, Elaine, swears by. Cut the beginning of your strip at a 45° angle, sew the binding down and then use the cut end as your guide for cutting the tail.
McCall’s Quilting magazine has a video showing the technique.

Blocking — How to “Encourage” Your Blocks to Size
A steam iron can be your friend in getting your quilt blocks to size. Click to expand.
Although the importance of accurate seam allowances is drilled into every quilter, most of us end up with blocks that are not quite the right size at times. Knitters are masters at blocking their pieces into shape, and quilters can add this skill to their arsenal, too. We’ll show you how to do this using sample blocks from Jinny’s Starstruck BOM quilt.
You will need:
- your not-quite-perfect block
- a pressing surface into which you can pin firmly
- a permanent or erasable marking pen
- ruler (a large square is great)
- T-pins (they are large, sturdy and can hold up to heavy steam)
- a steam iron
Most of us have a portable pressing surface with gridlines. We like to cover ours with muslin or another light-colored cotton fabric for two reasons: the gridlines probably don’t match our desired block size, and (if you are like the Studio staff) the pressing surface is likely to be a little grungy!
Stretch the fabric over the pressing surface and pin it in place. Mark the desired block size on the cloth. Here we’ve used a heat-erasable pen which makes it easy to re-use the cloth for different-sized blocks. If you will be blocking a large number of same-size blocks, you might want to choose a marker that won’t disappear with heat. In this instance, the block needs to be 12-1/16″.

Stretch the fabric over the pressing surface and pin it in place. Mark the desired block size on the cloth.

Start by using T-pins to pin each corner of the block and the center of each side, stretching the corners and edges to meet your marked block outline.
Continue pinning. Once everything is pinned, press the block from the center out to the edges, using steam, steam, steam! Let it cool completely before removing the pins.

You might also try spraying your block with a sizing agent after pinning but before steaming. That can help your block hold its shape.
There is a limit to how much you can stretch a block, but this technique can give you blocks that are much closer to the desired size — which will make assembling your quilt much easier. Blocking with steam can also be used to shrink up a block a little bit.
As always, we recommend you test this process on an extra block before trying it on one destined to be used in your next quilting masterpiece!

Converting Foundation-Piecing Patterns For Traditional Sewing Techniques
Not a big fan of paper piecing? Here’s how to convert a foundation-pieced block design for traditional piecing. Click to expand.
Foundation-piecing — often called “paper piecing” — was one of the great revolutions in quiltmaking. The technique makes it easy to get very accurate seams and wonderfully sharp points. However, it can’t be used for all blocks, and projects using foundation piecing are not portable.
Fortunately, it’s not difficult to convert a foundation paper to be sewn using traditional techniques. Let’s see how with the Day Lily block from the Jinny’s Garden block-of-the-month quilt.
Reverse the Image. Because fabrics for foundation-pieced blocks are sewn on the reverse of the paper, you need to work on a mirror-image of the foundation. There are two easy ways to do this: copy the foundation using a “mirror-image” or “reverse image” setting on a copier or printer; or work from the back of the foundation. (You might need to trace over the lines with a dark or heavy marker to see them easily.)
Make Templates. To make a template, lay a sheet of semi-transparent template plastic over the foundation. Using a permanent marker, trace the first shape onto the plastic. Those lines are the sewing lines, so you must also trace lines 1/4″ outside. (Jinny’s Perfect Piecer is ideal for this task.) Also be sure to add the piecing number to the template.

This is the original block foundation.
Trace the shape from the reversed foundation onto template plastic.

Mark lines 1/4-inch outside the original lines.

Be sure to number the template and add a grainline arrow.
Add Grainline Arrow. The stretch in a fabric isn’t nearly the concern when foundation piecing as it is when sewing traditionally. So, it’s important to add a grainline arrow to the template to help give your patch stability and prevent stretching. (For more information on grainline, see Jinny’s tip on The Importance of Fabric Grain.)
For Fewer Templates. To reduce the number of unique templates and patches you need to make, look for symmetrical patches. Many blocks — foundation and traditional — have patches that are repeated in the block as reverse or mirror-image patches. To cut out a mirror-image patch, you simply flip the template upside down. You find mirror-image patches on the opposite side of the center line in a block.
We’ve marked the center line on the Day Lily block. The patches marked 12 and 13 are mirror-image. Patches 8 and 9 look like they are mirror-images, but after making the template for 8, we discovered that 9 is a little different. It would need its own template.
You can also alter the patches a little to gain a little more symmetry. Foundation piecing requires that your next patch always covers the raw edges of the previous patches. So in Day Lily, Patch 11 is designed to cover Patches 8, 9 and 10. In traditional quilt making, that’s not necessary, so you could re-draw Patch 10 to extend to the center line. Patch 11 is then the mirror-image of Patch 10 — one less template to make!

Patch 10 is re-drawn to end at the diagonal center line of the block.

Patch 11 is now the exact mirror-image of Patch 10 and can use the same template.
Mark Seam Intersections. Foundation blocks often have patches with very sharp or unusual angles. It can be difficult to determine how to fit these patches together, so mark the seam intersections on your templates then transfer them to the wrong side of your fabric patches.


Converting Strip-Piecing to Traditional Quilt Making Techniques
Here’s how to convert a pattern that uses strip-piecing to traditional quilt-making techniques. Click to expand.
Strip-piecing is a wonderful quiltmaking technique: you sew long strips of fabrics together and then cut shapes from this newly assembled fabric. Many of my patterns use this technique because I think it’s a great way to add interest to a quilt: it allows me to add sections of shaded colors to quilt. My Summer Lily quilt uses this technique extensively.
Strip-piecing makes it very fast to create these high-interest quilt patches, but you do make sacrifices in fabric use: any of the strip-pieced fabric not covered by a template is not used in the quilt.

The portions of the strip-pieced fabric not covered by a template are not used in making the quilt.
Fortunately, it’s easy enough to convert a pattern that uses strip-piecing to traditional quilt-making techniques. It’s slower, but you’ll waste much less fabric and have a project that you can take with you to sew-on-the-go. Here’s how to do it.
Make Templates. You will need to make multiple templates from each template shape — one for each strip of fabric used in the strip-set. To make a template, lay a sheet of semi-transparent template plastic over the foundation. Using a permanent marker, trace a shape onto the plastic. The outside lines are the cutting lines; the dotted lines insides are the sewing lines.

Mark the fabrics to be used for each strip on the template pattern.

Place the template plastic over the pattern and copy the sewing lines and outside cutting lines.
You’ll also need to trace the horizontal lines that indicate the edges of the strip. Those lines are the finished strips, so you must also trace lines 1/4″ outside. (Jinny’s Perfect Piecer is ideal for this task.) Also be sure to add the piecing number to the template.

These lines are marked straight from the template pattern. The dashed lines show the sewing lines/finished size of the patch.

Add the outside cutting lines to the top and bottom of the patch.
Mark the Templates. Be sure to make each template with the template letter or number, the fabric to be used and the grainline arrow. (The grainline would typically follow the length of the strip.) Mark the seam intersections on your templates then transfer them to the wrong side of your fabric patches. This will make it much easier to match together the individual fabric patches when sewing.

What do you do if only the outer template edges are marked in the pattern?
Jinny Beyer Studio patterns always indicate the fabric strips on the templates, but other patterns may not. It’s still possible to create the templates you need. Read the pattern to determine the cut width of the fabric strips for the particular template with which you’re working. Substract 1/2″ from that cut width to determine the finished size of the fabric strip. For example, if you are instructed to cut strips 3″ wide, your finished size will be 2 1/2″.
If your template pattern has only the outside edges marked, draw lines 1/4″ inside those lines on all sides to mark the finished size. Next, measure the finished strip width (2 1/2″ in our example) up from the line marking the bottom finished edge and mark a line parallel to the bottom edge. Continue in this fashion to finish marking the template.


Inset-Seams
Y-seams scare off many quilters. But if you can start and stop sewing on a dot, you can make a perfect set-in seam. Here’s how. Click to expand.
Not all patchwork patterns can be assembled with continuous straight seams; sometimes a piece has to be set in. The most important consideration when setting in pieces is this: you must stop all stitching at the place where the seam allowances on the pieces cross, thus allowing an opening so the fabrics can be set in smoothly and without puckers.
Watch the video to see Jinny demonstrate the technique for those who sew by machine or by hand.

Making Templates
Rotary cutting with acrylic rulers is a wonderful tecnique, but there are lots of shapes that must be cut using templates. Don’t worry — it’s easy. Jinny shows you how. Click to expand.
To make templates, place semi-transparent template plastic directly over the pattern and trace the pieces onto the plastic, drawing any identification marks and grain lines. Jinny Beyer Studio patterns include seam allowances and typically show the sewing line as well.

Templates usually include the sewing line, the grainline arrow, plus any additional marks or notes that help in the sewing or identification.
Eventually you can learn to eyeball the quarter-inch seam allowance, but if you need a guide for sewing, trace the sewing line from the pattern piece onto the template. Put small holes in the template (a 1/16″ hole punch works great) where the seam allowances cross at the corners, then in as many times along the seam line as you think are necessary to give a proper sewing guide.
After lining up the edges of the pieces and pinning them together, place the corresponding template on top of the piece facing you and mark small pencil dots directly through the holes. You can then sew “dot to dot”. This method will save a lot of time as you do not have to mark the seam line on each piece, but only on the piece facing you as you sew.
Machine Sewing
If you have a ¼” sewing foot, it’s easy to sew an accurate quarter-inch seam. Using the template or Jinny’s Perfect Piecer to mark the corners helps ensure your accuracy and makes sewing inset seams or miters much easier.
Jinny now offers her own Template Film for making templates as described here. However, they can also be run through a laser printer — perfect if you have an electronic copy of a pattern!

Partial Seams
Some blocks that look like they require an inset seam can actually be constructed using a much faster technique: a partial seam. Let’s see how it works. Click to expand.
Some blocks that look like they require an inset seam can actually be constructed using a much faster technique: a partial seam. Let’s see how it works.

The Harlequin Charm (left) and Holiday Memories Table Runner (right) blocks both use partial seams.
Step 1: Sew the Partial Seam
Sew the first patch to the center, beginning from roughly the middle of the center patch and locking your starting stitches. If you are machine stitching, you can sew straight off the end of the fabric as you usually do. Finger-press the seam open.

The first patch is sewn to the center with a partial seam.

The next patch can then be sewn, as is usual, to the unit made with a partial seam.
Step 2: Add Patches in Sequence
By sewing the partial seam, you now have a complete side to which you can sew the next patch. Sew, finger-press the seam open and continue to the next patch. Continue sewing patches in this fashion. When sewing the last patch to the center, be sure to fold the partially sewn patch out of the way.

Add the subsequent patches normally.

Keep the first patch out of the way when sewing the last patch to the center.
Step 3: Complete the Partial Seam
After sewing the last patch to the center, you can finish stitching the partial seam to complete the block.
Look for blocks where patches seem to “pinwheel” around a center; they are often good candidates for this technique.
The Harlequin Charm quilt uses this technique . . . and the pattern is a free download. Why not give it a try? Just click on the image for more information.


Sewing Curves
Careful marking is the secret to sewing curved patches. It ensures your patches line up and your stitching is an accurate 1/4-inch. Click to expand.
Many quilters shy away from sewing curves. While it’s true that you can’t sew curved seams quite as fast as you can straight ones, with a little bit of care, you can achieve beautiful curves in your blocks.
When sewing together two curved pieces together such as the shapes shown here, mark the halfway spot on each of the pieces, as well as the places at the edges where seam allowances cross (indicated by dots.)

With right sides together pin the two pieces together at their mid points.

Next, pin them at dots where the seam allowances cross at the edges.
With the pins in place, fold each section in half to find the quarter points on both pieces. Pin the quarter points together. Pin the rest of the edges together, easing in fullness between the pins at the quarter and halfway marks.
Stitch the pieces together being careful to ease in any extra fullness. Press.
Machine Sewing Curves. Slow and steady is the key to making smooth curves when sewing by machine. Stop at each marking to adjust the fabric for the next section, matching the fabric edges and smoothing the fullness in the top fabric away from the stitching line ahead.
Some quilters find that reducing their stitch length a little gives them more control.
The Importance of Fabric Grain When Cutting Patches
To give yourself the best chance for blocks that lie flat and smooth, consider the fabric grainline when positioning your patches for cutting. Jinny gives you some tips! Click to expand.
To give yourself the best chance for blocks that lie flat and smooth, consider the fabric grainline when positioning your patches for cutting.
Wherever possible, plan to have the fabric’s lengthwise grain (along the selvedge) or crosswise grain (from selvedge to selvedge) fall along the outer edges of each section in the unit, block, or quilt. This eliminates possible distortion in the block.
Watch Jinny’s two-minute video for a quick explanation of grainline and some tips when rotary cutting patches.
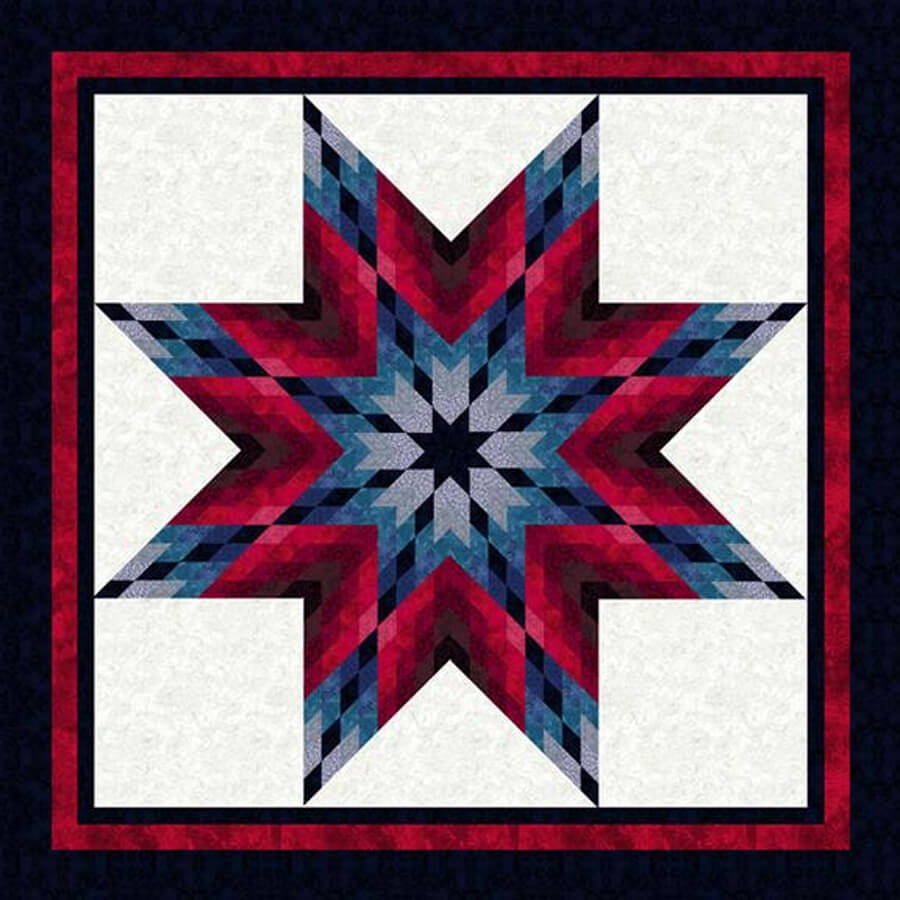
Tips for Piecing a Radiant or Lone Star
Piecing a Lone Star can seem like a daunting task but with strip-piecing techniques and a few tips we think you will find this much easier than expected. Click to expand.
Piecing a Lone or Radiant Star with its many 45° diamonds can seem like a daunting task. However, with strip-piecing techniques and a few tips we think you will find this much easier than expected.
Our staff pattern tester, Diane, has given us 10 tips to make this process go smoothly.

1. Offset the strips when sewing to use as much of your fabric as possible. Don’t be worried when your strip-sets have a small curve to them.

2. Draw a straight line on your ironing board. (Ours in the Studio has a pattern on it so we covered it with muslin first.) We’ve drawn a second line at 90 to the first and drawn tick-marks at 1-inch intervals along each line.

3. Since she is a hand quilter, Diane presses her seams open. She also finds it easier to match seams this way.

4. Line up the 45° angle line on your ruler with the raw edge of your strip set to trim.

5. Rotate the strip-set and cut your segments to the appropriate size. Check the 45° angle every few cuts and trim if necessary.

6. Diane likes to trim off the points before joining the segments. Line up the first two strips to see where you need to trim.

Align the marks on the trimmer with the raw edges and trim.

7. Take your first two segments and place them right sides together. Mark your ¼” seam allowance on the right side of the bottom segment and on the wrong side of the top.
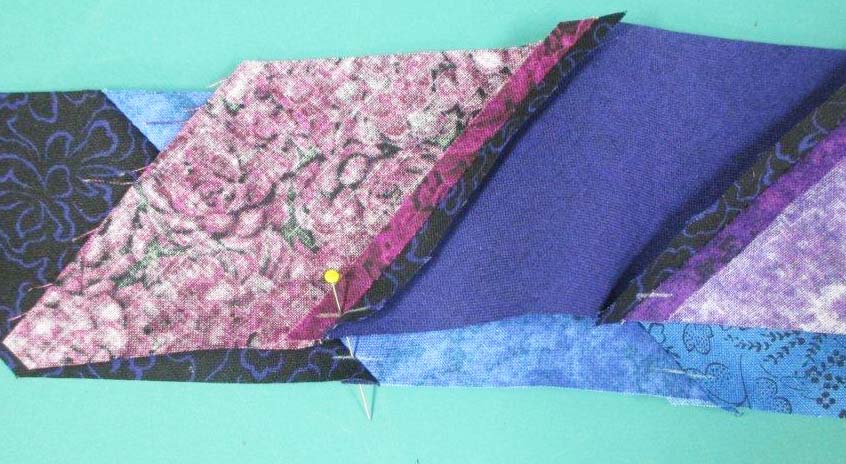
8. Not everyone is a pinner but, in this case, we recommend it. Place a pin on the mark one thread away from the seam allowance on the top, going through to the same side of bottom segment on the drawn line.

9. Hold the pin straight up and down and pin just next to the aligning pin, taking a small bite of fabric.

10. Here’s how it should look.
You are now ready to sew! Follow these tips now and when joining the pieced diamond units together.
For more information, check out this wonderful video on the McCall’s Quilting, showing how to make Jinny’s Lone Star Salute quilt.
Tips & Lessons Menu
Design & Color
Hand Piecing
Hand Quilting
Sewing Tips
Terrific Tools