Tips & Lessons Menu
Design & Color

Hand Piecing

Hand Quilting
Sewing Tips

Terrific Tools

Working with
Border Print Fabrics
Working with Border Print Fabrics

An Introduction to Working with Border Print Fabrics
Jinny introduces you to some of the secrets of her border print fabrics that make them ideal for quilters. Click to expand.
Jinny’s border print fabrics are designed by a quilter (Jinny, herself) for quilters. As a result, the fabrics can be used with minimum waste and maximum design possibility.
Watch the video to learn:
- how Jinny first began using border prints in her quilts
- how to identify the seam allowances between stripes in the fabric
- how to calculate how much fabric is needed to frame a quilt with border print
- how to find mirror-image motifs in the fabric for great design possibilities
Then be sure to explore this Working with Border Prints tips section to find all the free patterns and instruction on using border print fabrics in your quilts.
Border Print Place Mat & Table Runner
Just six pieces and one fabric are all it takes to make this gorgeous project. Suitable for quilters of all levels. Click to expand.
Jinny’s border print place mats and table runner are a great project to begin exploring the possibilities of her signature fabric designs.
In this video, Jinny gives you an overview of the project and shows you some wonderful examples of what’s possible.
Download the free pattern and make up a set of place mats in just a day! All you need is 1/2 yard of border print fabric for each place mat, or 2 yards for a table runner.
Browse all of Jinny’s border print fabrics here.
Download Place Mat & Table Runner Pattern

Creating Border Print Squares
Add some impact to your quilt or block by incorporating a border print square. It’s as simple as cutting four identical triangles. Click to expand.
Squares are the most common shape in patchwork blocks. If a block includes a large center square, consider replacing it with a border print square made from four identical triangles. Or, rather than alternating pieced blocks with plain ones, use border print squares for the alternate blocks for lots of impact with very little sewing!
Download Border Print Squares Made Easy for future reference.
Step 1
Determine the finished size of the square needed. Divide the square diagonally from corner to corner to create four triangles as in the diagram, right. Make a template from one of the triangles from see-through template material. Be sure to add a ¼-inch seam allowance around all sides of the piece. Draw a line down the middle of the template as shown, to use as a mirror line.

Make a template by tracing around one of the triangles, then drawing 1/4? outside those lines.
Step 2
Using the mirror line as a guide, center the template on one of the motifs in the border print fabric, making sure that a line from the border print falls just inside the sewing line on the long side of the triangle template. (This ensures that you will have a nice line or frame around the outside of the finished square.) Mark some portion of the design directly onto the template to use as a guide for cutting the remaining pieces. Carefully draw around the template and cut the piece out.
If you want to see what the square will look like before actually cutting the pieces, position the template onto the fabric, then place two mirrors on the two short sides of the triangle so they meet at a right angle. Carefully remove the template to see what the finished square will look like.

Center the mirror line on the fabric motif and draw a portion of the fabric design onto the template.
Step 3
Cut three more triangles identical to the first, then sew them together to complete the square. Placing your triangle on different portions of the border print will produce different effects!

Four identical triangles sew together into a gorgeous border print square.

Simply changing the position of the template on the fabric creates a host of designs.
Creating Curves with Border Print
You can create the look of curves using small segments of border print fabric. It takes some time, but the results are fantastic. Click to expand.
My Windows quilt appears to have border print circles in several places.
The curves are actually an illusion: the four different circular bands in the quilt are made up of small wedges of fabric that have straight sides. However, by dividing the bands into pieces, you can get the appearance of curves. the quilt center is shown here.

Jinny’s Windows quilt, made to honor the victims of the 9/11 attacks.
Let’s look at the center of the quilt first. The center block, Liberty’s Crown, appears to be a circle. However, look at the line drawing: the very center “circle” is actually a polygon with 16 sides, and the circular “frame” around it is actually made from 16 wedges.
All the sides of the wedges are straight lines, but because the lines are quite short, when the wedges are sewn together, the section appears curved.

The frame around the center image appears circular but is actually made from 16 wedges.
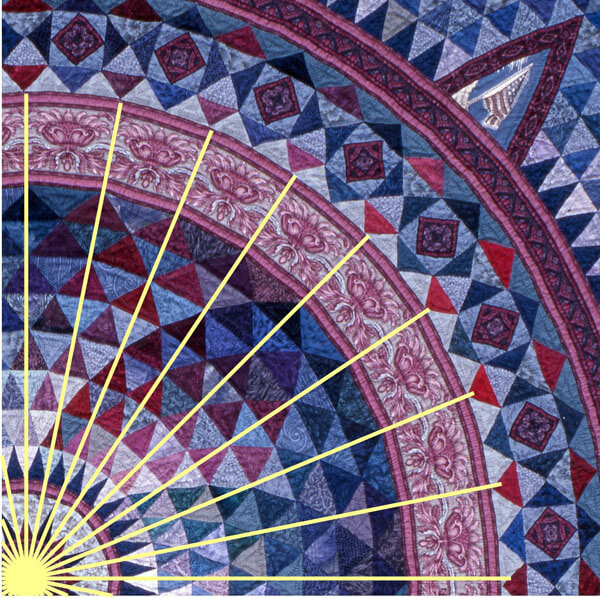
There are four bands of “curved” border print fabric in the quilt. The smallest band (the one around the center patch with Lady Liberty) is made from 16 wedges; the outermost band is made from 128 wedges!

This band in the quilt was divided into 32 sections. One quarter of the quilt center is shown here.
Here’s how you can convert a circular band to use this technique.
 1. Divide the band into segments. For the example below, I’ve used just eight segments rather than the 32 in the quilt. (The larger the circumference of the band, the more segments you’ll need to maintain the illusion of curves.) Using a computer makes this super-easy, but you can also use a protractor to determine the position of the angled lines.
 2. Replace the curved lines between your angled lines with straight lines. (Remember that this will change the shape of the patches above and below the band, too.)
 3. Trace over the wedge to get your finished patch size and add a ¼” seam allowance all around.
This technique will work for any fabric, but because I wanted to use border print fabric, there were two more things I had to do.
First, I wanted the band to include a printed stripe around the inside and outside of the band because I like the way this frames an element in a quilt. So I needed to make sure that the band in my quilt was the same height as the border print I had selected.
 After drawing the straight line between two angles on the inside circle of my band, I drew the second line the width of the border print (4 ½”) above the first. After adding the seam allowance around the edges, my template was the perfect size for cutting the border print.
Secondly, for the design to flow smoothly around the band, I needed to cut identical fabric patches, all of which had the same mirror-image element centered in the patch. (The blue line on the template indicates the mirror image.)

The template is used to cut identical wedges from the border print fabric.
Creating curves with border print fabric isn’t something you can accomplish “lickety-split”, but it also isn’t as hard as it might seem. It just takes some time and patience.
For even more information, see my book, Quiltmaking by Hand, pages 139-141 and 154-155.

Creating Perfectly Matched Designs
Sometimes, no matter how careful you are, the designs on the edges of patches you cut from border prints just won’t line up for a perfect match. Click to expand.
To create kaleidoscopic effects in patchwork blocks, each of the fabric patches must have identical designs.
However, even though you work really hard to cut the pieces exactly the same they do not always match. Because fabric can stretch during printing or cutting, even though the mirror line on the template runs exactly down the middle of the mirror line on the fabric, it is possible that the opposite sides of the patch will not have exactly the same motif as the left side. Sometimes it is off by as much as an eighth of an inch.
So how to get that perfect kaleidoscopic effect? Simple! When pinning the pieces for sewing, line up the design printed on the fabric, not the edges of the patches. If one of the pieces is off by an eighth of an inch, then the other side will be off by the same when you sew the other side. These off-set pieces will even each other out and the designs will line up perfectly.

As indicated by the arrows, the fabric design does not match exactly on both sides.

Although the seam allowances are uneven on each seam, they will even out over the whole unit.
By matching the design and not the fabric edges, you get a perfectly matched unit.

Framing a Quilt with Border Print Fabric
Learn Jinny’s easy, no-math method for framing a quilt with border print fabric. Click to expand.
Jinny frames most of her quilts with border print stripes. Watch the video to see Jinny step you through her easy, no-math method of adding mitered border print borders to a square or rectangular quilt.
And for future reference, download and print the instruction sheet below.
Adding Mitered Borders the Jinny Beyer Way

Fussy Cutting Border Prints for Hexagons
Fussy cutting hexagons can lead to some amazing special effects. Jinny shows you all the fun you can have cutting your hexies from border print fabric. Click to expand.
My first patchwork quilt was a Grandmothers Flower Garden design, made with hand block printed fabrics, purchased from local textile markets in India where I was living at the time. Little did I know that that quilt would catapult me into a world of design and color that would affect the rest of my life.

More than 30 years ago I purchased an antique quilt made in the early 1800’s. I had already been “fussy cutting” border print fabrics and mirror imaged fabrics to create interesting effects and I was thrilled to see that the maker of that quilt had “fussy cut” motifs in the fabric to center in each hexagon.

Border prints with their mirror image motifs can lend another level of interest altogether and give a wide variety of diversity to the design. For the best effect, use the ring of hexagons around the central piece.
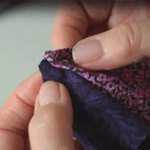
To fussy cut hexagons, mark a mirror line down the middle of the template. Center the mirror line over a mirror-imaged portion of the border print, then draw some portion of the fabric design directly onto the template. This will provide a guide for cutting five more identical pieces for the first ring of hexagons.

Place the template on on a variety of different mirror motifs in the border print. There will be very little waste when you cut pieces in this way. The challenge is to see how many different designs you can get from just one fabric.

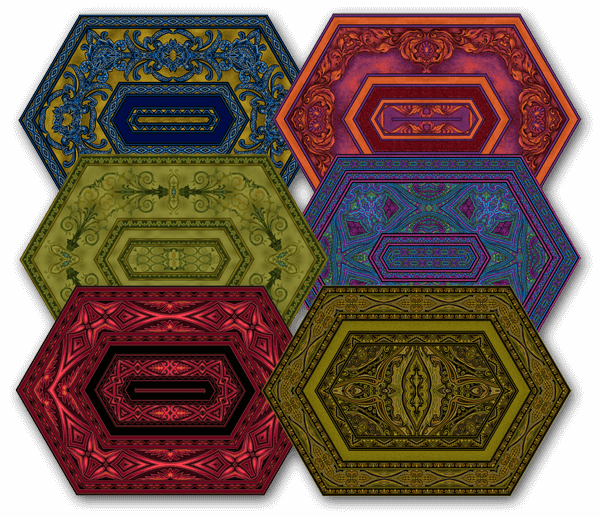
Cutting hexagons in the positions above creates all these different looks.

Some of the effects are achieved by simply turning the hexagons upside down. See the examples below: both blocks use the identical patches, but the striped portion is positioned toward the outside of the block in the first example, and the inside of the block in the second.

Tip Notes
Jinny set her hexagons with a diamond path. These are the shapes she used.

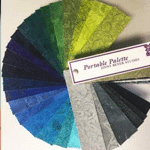
Fabrics used in these illustrations are from the Ashford Collection:
Border Print:1695-04
Light Background: Palette #110
Red Accent: 1696-04

Magical Effects with Border Print Fabrics
Learn how to add some magic to your quilt blocks by incorporating patches of border print fabric. Click to expand.
Quilters have been fussy-cutting fabric since the very beginning, and border prints create unique effects when cut carefully to fit in a specific patch.It can be as simple as replacing a single patch in a block or subdividing a large shape and using an identical piece of border print in each of those new pieces.
Watch the video to see how much impact you get with this technique and to see Jinny demonstrate how to modify a block to get that border print special effect.

Making Other Shapes in Border Print Fabric & Paisleys
Incorporate border print fabric into geometric shapes in your blocks for truly magical effects. And all it takes is a bit of fussy cutting! Click to expand.
Other geometric shapes can be made with a border print fabric in the same way as a square. The secret is to divide the shape into identical triangles. Create a template for that triangle (be sure to add the seam allowance), then cut as many triangles as you need from identical portions of the border print.
For detailed information on using border prints in many ways, download the Making Magic with Border Prints Booklet.
Another great reference is Tips on Fussy Cutting Patches — another free download!


Mirror-Image Patches & Border Print Diamonds
Border print diamond patches look great and are super-easy once you know Jinny’s secret. Click to expand.
In many quilt blocks, cutting identical patches and then sewing them together creates beautiful effects.
Sometimes, however, you need to sew a patch to its mirror-image. Fortunately, that’s easy to do!
In the Queen’s Crown block, the illusion of a border print frame is achieved by putting one patch right beside another that is its exact mirror image. If two patches will meet, using one regular and one mirror-image patch will allow the design to seem to reflect naturally around the corner.

Mark the design motif on your template and use it to cut the number of regular patches you need.
Then, just flip the template over and use it to cut your mirror-image patches, lining up your design motif markings with the matching motifs on your fabric.

Although the two diamond patches seem very similar in the block, their differences are more apparent here when pulled out of position. (The red lines indicate the sides that adjoin each other in the block.)
Border Print Diamonds
You can create spectacular effects using this technique in diamond-shaped patches. To create a border print diamond, you need four triangles: two are the same and two are exact mirror images.
Here’s how you do it.
 1. Divide the diamond in half lengthwise and crosswise. Make a template from one of the four resulting triangles. Add the seam allowance to the outside and an arrow to show the lengthwise grain of fabric.
 2. Position the template onto the fabric and draw a design motif from the fabric onto the template. Cut two identical triangles. These are the regulartriangles.
3. Now, flip the template over and align the markings on the template with the fabric grain and the matching design motif on the fabric. Cut two of these triangles. These are the mirror-image (or reversed) triangles.
You will have two sets of mirror-image triangles that form an intricate-looking diamond when sewn together.

Tips & Lessons Menu
Design & Color
Hand Piecing
Hand Quilting
Sewing Tips
Terrific Tools