The first July 4th after we were married, John and I were invited to a pot luck barbecue with other graduate students. One of the dishes was an incredible pork and beans casserole. I asked for the recipe and was surprised at how easy it was to make. I have made several changes over the years and refined it and it has been part of our holiday barbecue ever since. This year since we are beginning to gather again, I want to share it with you.
Jinny’s Baked Beans recipe
2 Large cans Campbell’s pork and beans (28oz)
1 can Campbell’s cream of tomato soup
¼ cup brown sugar
1 lb. “hot” Jimmy Dean or Bob Evans pork sausage
2 crisp apples, peeled and cut into bite size chunks
Sauté the sausage and drain excess fat. Put all ingredients in a covered crock and stir together to mix.
Bake in a 250 degree oven for four hours. Remove lid during last half hour. Let sit for 30 minutes before serving.
What kind of needle do you recommend for both hand piecing and hand quilting?
First let me say there are a wide variety of needles, sizes and styles available and there are no rules as to what to use. Generally, most quilters prefer “betweens”, but some use applique needles. It depends on how you hold your needle , your method of sewing and whether you do or do not use a thimble. I can tell you the kind I use and why, but you may have different preferences depending on how you sew.
Labyrinth up close
I use a between size 11 needle for both piecing and quilting and have been doing so for all of my quilting life. Many people find the size 11s are too small for them and prefer to use a size 10. Betweens are sturdier and shorter than applique needles which are longer and finer. I put a lot of pressure on the needle when I sew and if the needle is too long or fine, I break it within the first few minutes of sewing. The sturdiness of the betweens eliminates this problem. Also I find that the smaller the needle, the smaller my stitches.
There are also differences in the eyes of needles Some brands have larger eyes and/or put a thin gold coating on the eye. The idea being that both of these practices make it easier to see the eye for threading. For both piecing and quilting, I stack several stitches on my needle at time before pulling it through. As such, I find that when the eye is slightly larger than the shaft it is difficult to pull the needle through and even if the eye is not larger, but has a gold-plated eye, that little extra metal can affect the size of the eye and puts a drag on the needle. I have resorted to keeping a pair of small nosed pliers handy to pull the needle through each time.
Recently I have discovered a new needle. It is the John James Signature collection needles. The finish on it makes it very easy to go through the fabric, the eye appears to be the same size as the shaft and it is sturdy enough to handle the abuse I give a needle without bending or breaking, I like the packaging the needles come in—a small tube with 25 needles per tube. That may make them seem more expensive, but most needles come in packages of 10. I have been using the Signature between 11 for both piecing and quilting and have be able to put the pliers away. For me it is definitely the Cadillac of any needles I have tried.
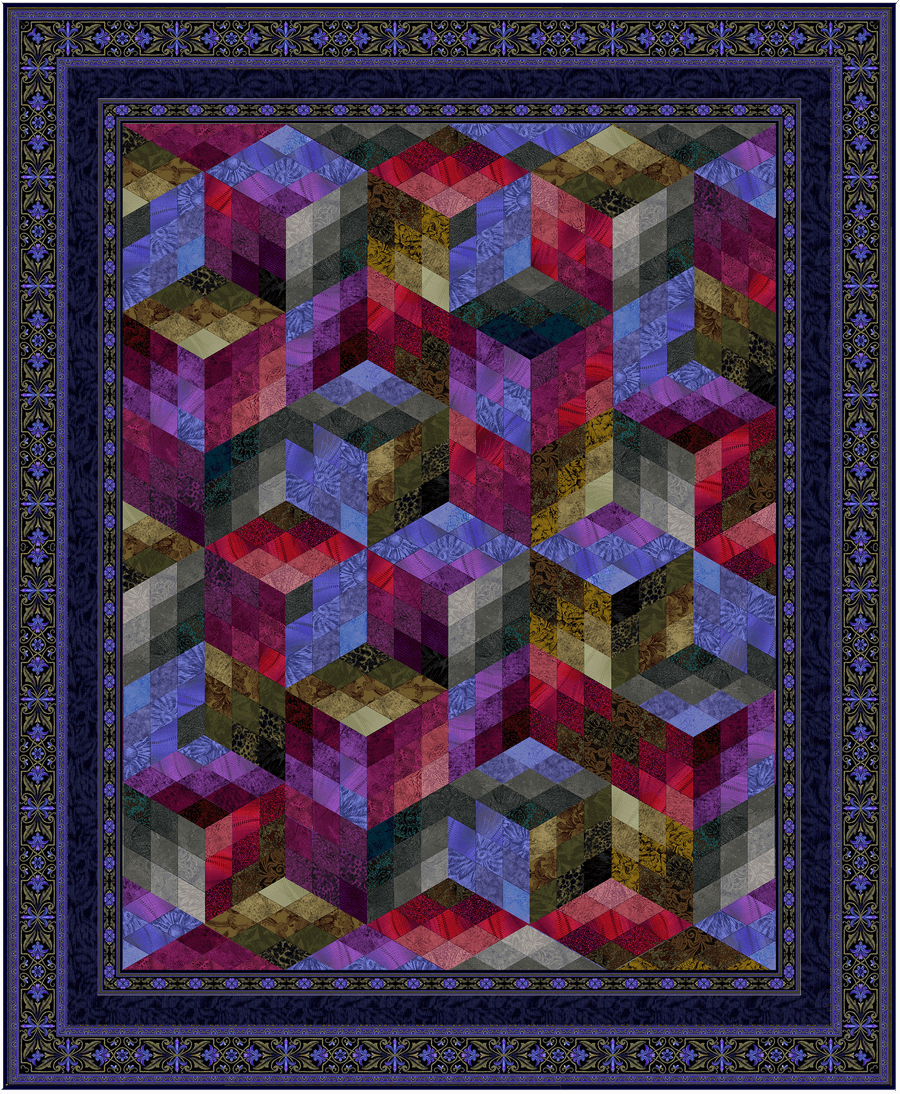
In my last blog I talked about taking a block design and making it with multiple fabrics for a scrappy effect. That blog has information that is helpful in understanding how I placed the fabric in the blocks used in this blog as well.
I was so excited about this painting my niece, Tanis Rovner, painted that the colors in the image inspired our Tropical Paradise bundle. Since this is such a popular color scheme, I decided to show how you could use all of the 14 fabrics we put in the bundles in a block that would normally use six or seven. This is just what I did in Desert Star and can be done for any quilt that could be made with only three fabrics.
Both of these blocks are free patterns that are in our Quilters’ Block Library on our web site. I chose the 12” pattern for 1904 Star and the 10” pattern for Attic Windows
Beginning with 1904 Star, notice that the light, medium and dark value placement is the same in each of the two blocks I created but most of the fabrics are different between the two. I was able to use all 14 bundle fabrics between the two blocks and then I alternated them in the quilt.
I created these blocks and quilt digitally but if I were actually sewing them, I would find it boring to repeat the exact same blocks throughout. For me the fun part is experimenting with lots of different fabrics that fall within the same color scheme. It is a good lesson in color and value placement to make each block different. If you like the colors in the Tropical Paradise bundle, begin with it and then go to your stash and find as many colors as you can within the same range.
TIP
If you can’t find as many fabrics as you want in a certain color, did you know that you can sort fabrics on our website by color? You can go to this link and then advanced search and select the color range you want and click on “GO”.
The second block I experimented with is Attic Windows. While this particular design can be made with just three fabrics—a light, medium and dark—it is perfect for a scrappy looking quilt. All fourteen fabrics in the Tropical Paradise Bundle have been used in these two blocks and then the blocks alternated in the quilt. Once again, as with 1904 Star, I would make each block with a variety of different fabrics to add to the scrappy look. I try to get a good balance of value and color within each block, so the colors just meld together, and the blocks disappear when they are assembled.
Please note that even though there are three values, each of the darks do not have to be very dark and the mediums do not all have to be the same value. Depending on the effect you want you can also use different lights for the lightest value in the quilt. As long as the medium piece is lighter than the dark next to it, it still reads as “medium”. Same with the mediums and lights. Sometimes one fabric might be used as a dark in one block, but a medium in another.
I always like to add a border to finish off a quilt. It is like adding a frame to a painting or piece art. Borders can be all one fabric, more than one fabric, border prints or pieced or appliqued. Some people prefer no border at all. In any case, the borders should carry out the colors from the inside. The colors of the border can drastically affect the color image the entire quilt portrays. You can see the no border options above and two different options below with these two quilt designs.
Growing up, we had a scrap bag. While I didn’t start quilting until I was an adult, as a child I was always sewing something. My sisters and I made a lot of our own clothes and there were always leftover pieces. I would look through the scraps searching for the right piece for various projects, including doll clothes, which I made by the dozens.
So naturally when I began my first quilt I automatically went to my scrap bag. I was living in India at the time and had fallen in love with the Indian hand-block printed fabrics. I had made clothes, bags and other items as gifts and for my own use and all the scraps went into the scrap bag. My first quilt, begun in 1972, was a Grandmother’s Flower Garden made with fabrics from that bag. Although I have to admit I made a few trips to the marketplace to purchase a few more fabrics for my quilt.
I “organized” the scraps so that I would use the same fabric in individual flowers, but then each flower would be put together differently. There were a few repeats.
From that point on, I have loved making quilts with lots of different fabrics. To me, the more fabrics the better.
I often am asked, “I understand how to use lots of different fabrics in quilts such as Baby Blocks or Thousand Pyramids, but how do you do it with block style quilts?”
First and foremost, you have to select a block design, shade it in grey scale, and determine where you want the lightest, mediums, darks and darkest tones. I will illustrate with the block used in my quilt pattern Desert Star but the same process is used for all of my designs.
Here are two different ways you might choose to shade in the block, Desert Star.
Version A
Version B
I selected version A and then decided how many different value groups to have in the quilt. You can see here that I have six different values. Number 1 is the lightest fabric. Fabrics 2 through 4 are light to dark with light in the center. Number 2 is not as light as the background fabric, number 1. Fabric 6 is a medium value and could be similar in value to fabric 3.
Once you have the block design and have decided on value placement within the block, the next step is to select a palette of colors. If you are at a loss for colors that look good together you might want to select one of our shaded bundles to start with. To get as many fabrics as possible, fill in with colors from your stash that fall within the same general color range as those in the bundle.
Next sort the fabrics into color groups. Here are the color groups I used when I made the quilt from the Sonoran Spring bundle:
Group 1, lightest fabrics for background
Group 2, star points light
Group 3, star points medium
Group 4, star points dark
Group 5, darkest fabrics for small triangles
Group 6, medium blues/blue grey for large corner triangles
Here are four different blocks made up of those color groups. It is fun to see how many different blocks you can make using the same “formula.” Since this is a digital image, I have only used the four different blocks in the quilt shown here, but if I were making the actual quilt, I would follow the same formula. Keep in mind that you don’t have to be strict with the colors. For instance, depending on the other fabrics used, a fabric used as a dark star point in one block might be a medium point in another block. Just have fun and relax!
Stay tuned for another blog on how to incorporate border print fabrics in this design.
We received an email from Jan about a postcard she bought on eBay from a woman in Latvia. Included was a photo of this card and she was wondering if we could tell her more about it. Shown here is that card. Yes, that is me from very long ago.
Many of you may know that, besides quilting, one of my other interests is amateur radio. When my father was a young boy he got his first ham radio license. To confirm a contact with another radio operator “hams” send out QSL cards. My father’s interest passed to me and I got my first license in 1957 (K6RQB) when I was in high school. I continued my ham radio activities until 1984.
I had quite some adventures along the way. Shortly after getting my license, Russia launched the first satellite to circle the earth. My father and I got up in the middle of the night so we could hear the first morse code signals the satellite emitted.
A few years after I was married, my husband, John, got a job in Nepal and right after that in India. My husband and I and our two young children went to live Nepal in 1968. I had been an active ham in the States and I got a license there.
Once in Nepal, I was one of only two hams in the country, and the only one who operated in both voice and morse code. I was able to talk with my father almost every day. One of my frequent contacts was with King Hussein of Jordon who was also a ham. The American ambassador to Nepal was married to the ambassador of Viet Nam and the only way they could contact each other was by radio and Madam Ambassador would come to my house once a week to talk with her husband by way of a ham in Viet Nam.
Just like quilting, there is a bond among hams around the world. When my sister died and I made arrangements to fly home, obviously anyone listening knew my plans. At every single stop on the way home, a ham radio operator was there to greet me and make sure I had no trouble with my connections…New Delhi, Bangkok, Hong Kong, Honolulu and Los Angeles.
These days we are very lucky to be able to easily communicate with almost anyone, anywhere, but back then, this was quite a handy hobby to have.
To read more about this, my story appeared here on the web page for ham enthusiasts and their history here.
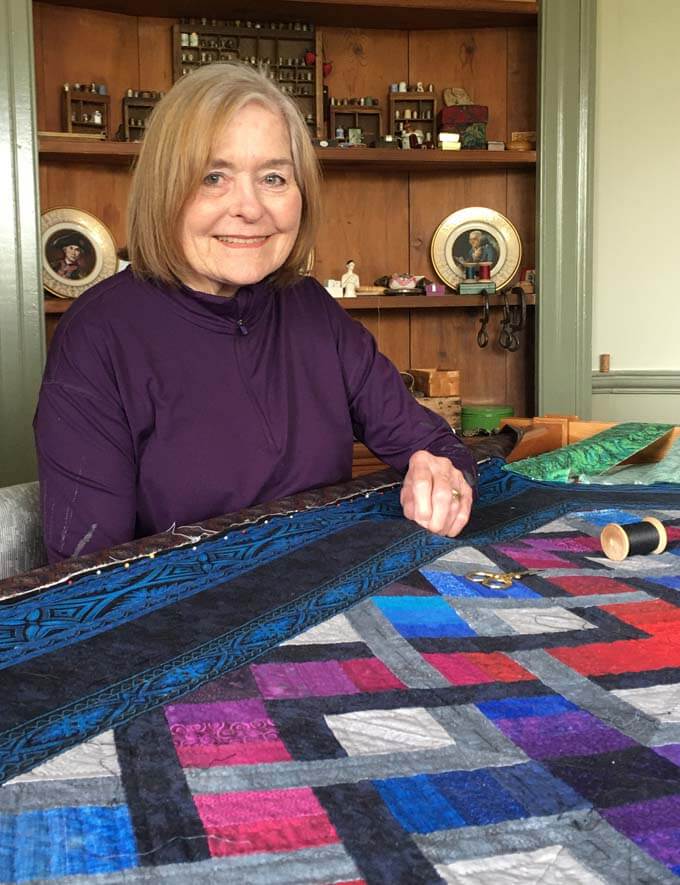
I have been very lucky to have been quilting, teaching, writing books and designing fabrics for quilters for more than forty years. This past year, while there have been many things I haven’t been able to do, the Studio continues to operate, as an internet only business.
One positive we have found in the past several months is an influx of new quilters and others who have just “found” us. We welcome you all!
Since many of you are not familiar with me and my work, we have decided to add a feature to our newsletter called “Get to know Jinny Beyer” and each month I will answer a question you may have about me or my work.
One question I get asked all the time is “How did you get into fabric designing?” My answer has always been that I got in through the back door, not the front.
I have been sewing all my life and lived for several years in Malaysia, Nepal and India where I collected batiks and hand block printed fabrics. I began quilting while living in India and used scraps from all my sewing projects for quilts. Of course, I had to buy more specifically for quilts!
Jinny’s first quilt made with Indian hand block printed cottons, Grandmother’s Flower Garden
Upon returning to the States in the early 1970’s I was very disappointed in the fabrics that were available….mostly cutesy calico prints done in primary colors. After a few years of disappointment in what was available I decided that maybe I could tell fabric companies what kinds of fabrics quilters would like. I took it upon myself to put together a portfolio of prints and colors that I liked and how I would change them and made appointments with three different fabric companies. I took the train to New York full of optimism and came back home full of disappointment. At each place I got basically the same questions and the same treatment before they even looked at my portfolio. “Where did you go to design school?” “Were you a textile major in undergraduate school ?” “Have you studied color and color theory?” and on and on. I had never had that kind of an education. I had a master’s degree in special education. I felt like a little kid getting a pat on the top of my head as I left through the front door of each place.
I decided fabric designing was not in the cards for me.
Ray of Light
Then out of the blue one day in the late 70’s, I received a phone call from Nancy Puentes and Karey Bresenhan, the founders of the International Quilt Market. By this time my quilt, Ray of Light, had won the Good Housekeeping Magazine’s “Great American Quilt Contest” and my name was becoming known by quilters outside my own area.
Nancy and Karey were concerned that independent quilt stores were struggling to stay in business because they were competing with large fabric chain stores who could buy the fabric in bulk for better prices and offer them at a discount.
They had approached VIP, a New York basked fabric manufacturer, and asked if they would be willing to create a line of fabric that would not be sold to chain stores and that was exclusive to independent fabric retailers. They felt a quilter’s name should be associated with the collection and thought of me. Thus, their phone call.
I worked with VIP for three years, but in the early 1980’s they decided that quilting had reached its peak and they were going to get out before the interest waned and they dropped my line. That is when RJR contacted me and the rest is history. I have been working with them ever since.
My textile education has been learned through being immersed in the actual designing and creating for more than 40 years. I have yet to take a design or color course. As I like to say, “I got in through the back door, not the front.”
On March 16, 2020, the governor of our state issued orders to help curb the Corona-19 virus. In compliance with those orders and in the interest of the well-being of our staff and customers, I closed the brick and mortar portion of our business and went strictly to online sales. This was also two months to the day since my husband passed away.
I took a walk around my yard that day, noticing the signs of the rebirth of spring. It was a beautiful, sunny day. The hellebores were in full bloom, daffodil buds were beginning to open, and it was a good time to reflect on what was going on around me.
Hellebores
Daffodils
As I was walking up the steps to my kitchen door, a plant, right under the bay window and near the bird feeder, caught the corner of my eye. It looked like a large weed. I went back down the steps prepared to pull it up and stopped myself. If it was a weed, it was a rather more important weed. The stem was quite strong and the leaves quite large. It was about 10 inches high. We feed the birds shelled sunflower seeds and I wondered if one of those seeds had sprouted. I decided not to pull it up and see what would happen.
Young tree
The plant proceeded to grow at least a foot every three weeks. By mid-June it was four feet tall. I still thought it might be a sunflower and what a nice treat that would be for the birds once it flowered. Also, about that same time, I spotted this newly born fawn camouflaged amongst my pachysandra. I sent the photo to my grandchildren and my daughter wrote back “It won’t be so cute when it is big enough to start eating your perennials.”
On July 16, exactly four months from when I first saw the plant, it was now taller than me and halfway up my bay window. I now determined for sure that it was definitely not a sunflower. I made up my mind that it had to be Jack’s Bean Stalk, reaching up to the clouds.
Also, the fawn was now definitely big enough to enjoy my plants.
By August 16th the “bean stalk” was almost up to the gutters and the leaves were so huge some of them were as much as 25” across.
I decided to get serious and see what on earth it was. I followed my granddaughter’s advice. “Just ask Google. Google knows everything.” And sure enough, according to Wikipedia:
“Paulownia tomentosa, common names princess tree, empress tree, or foxglove-tree, is a deciduous tree in the family Paulowniaceae, native to central and western China. Wikipedia”.
The tree been used for centuries for medicinal, ornamental and timber uses. It was imported to Europe in the mid 1800’s and shortly thereafter introduced to the Eastern United States.
In April or May the tree sends out beautiful purple foxglove-like fragrant flowers.
I did a little sleuthing and discovered that a neighboring farm has for years been planting the trees as a crop. I guess one of the birds at my feeder also visited the farm and brought a seed to plant in my garden.
By September 16, it was reaching towards the chimney and by October 16 it was literally at the chimney.
Now, the middle of November, my pandemic tree is rather sad looking, having dropped all its leaves. It is as though it is crying for all those lost in this “lost year.”
Paulownia Pandemic tree will be moving soon to a location where the fast-growing roots won’t destroy the foundation of our house and where it will have plenty of room to grow to its eventual height of 50-70 feet.
As I watch it go into its dormancy stage, it brings me hope that this “lost year” will be in the past and that when my tree awakens in the early spring, the world will also begin a rebirth and that we will get our lives back to some kind of normalcy in 2021.
This is a little diversion from quilting but most quilters also love to cook.
Like so many of us during this pandemic, I have pretty much been hunkering down and staying home. One of the things I have been doing is baking sourdough bread. I have talked before about my 50 year old sourdough starter that I began while living in India. I have been keeping it alive all these years and recently have been doing more and more experimenting.
Last year a friend told me about Breadtopia.com and that web site has changed my sourdough bread baking forever.
When the pandemic hit, grocery shelves were devoid of bread, so for that reason I decided to make bread more often but then flour and yeast were hard to find. I didn’t need yeast because I had my sourdough starter but I needed flour. So, I decided to grind my own flour from a variety of wheat berries that Breadtopia sells. They also sell the home mill. The benefits of freshly milled flour are many but mainly there are no preservatives and it uses the whole wheat berry which is so much more nutritious
I now use solely whole grain freshly milled flour that I mill myself in my Mockmill 100 home mill that my son gave me for my birthday.
The web site has many recipes and videos showing every step of the way and they sell all of the best products used in breadmaking, including the clay bakers and wheat berries. One of my favorite recipes is this Whole Spelt Sourdough Bread, shown below. If you are interested in trying this bread for yourself, here is the link to the recipe along with the video tutorials.
In honor of National Homemade Bread day on November 17th, I took a photo of one of my loaves and with the Photoshop trick that I showed in this blog post, I extracted the colors. I have often said that a perfect color palette for a quilt also includes neutrals. These colors make the brighter colors stand out.
Red Fort and Snowbirds are good examples of quilts with lots of neutrals worked into the colors.
In your next quilt project see if you can include neutrals in your color palette.
If you are interested in trying this bread for yourself, here is the link to the recipe along with the video tutorials.
In my last post, I discussed my Day Lilies quilt and how to plan fabric and color schemes for this and any “scrappy” quilt. Today, I’m continuing that discussion.
Step 1.
For any scrappy quilt, I think it would be impossible to try and plan the placement of every piece in advance. I like to work in units, making sure that the balance of color and fabric placement within each unit is satisfying to me.
For Day Lilies, my unit was one petal. I made stacks of brown, red and purple petals, using a wide variety of different fabrics.
Depending on your pattern, you may have just random placement of dark, medium and light within the units such as is done with Thousand Pyramids.
Or you may have colors shaded light to dark within each unit such as Day Lilies above or Urban Sunset shown here.
When working with shaded units, I have a little trick to make easily get several different units. Lay out a group of fabrics in a “run,” light to dark. Here I have such a run which I might use for Day Lilies. There are 11 fabrics.
I only need seven fabrics for a Day Lilies petal so I could make one unit using in order fabrics 1-7, for another petal I could use 2-8, then 3-9 and so forth. This will yield five different petals. Continue doing this with different runs of shaded colors.
For Urban Sunset, some of the nine-diamond units are shaded light to dark lengthwise and some are shaded light to dark sideways as seen above.
For these units, I did the same thing as shown above on Day Lilies. I arranged several “runs” of fabrics such as this one which contains nine fabrics shaded light to dark.
Since only five fabrics are needed for each unit in this quilt, there are five possible units that can be made shading them lengthwise and five sideways for a total of 10 different units. The lengthwise shaded ones are shown here.
When I find a unit with colors that I like, I will make at least two of the same colors. They will be used in different parts of the quilt so that the same units are not adjacent to each other. The Urban Sunset Pattern shows how the smaller units are formed into the increasingly larger units.
Once I have a good amount of what I call the “base” units, I will start arranging them into larger units. For Day Lilies, it is the large flowers by color – purple, red and brown.
For Urban Sunset, it is the larger units that are built according to the directions in the pattern.
For Thousand Pyramids you will make two sets of units one with the dark triangles at the bottom and one with the light triangles at the bottom. These are then alternated in the layout of the units.
After the larger units are sewn together then is when I finally like to lay them all out on either a design wall or the floor and arrange them to my liking. You will find that if you are satisfied with the base units and then the larger units, you will be pleased with the overall arrangement.
I find that if all the pieces of the quilt are decided upon in advance, it does not allow for the quilt to “speak” to you. Some of the spontaneity is lost and for me part of the pleasure of making a scrappy quilt with lots of fabrics is the discovery along the way.
We had a huge response to my quilt, Day Lilies, when we placed it at the top of our Facebook page. There were many requests for a pattern and kit to make it. There is a pattern available. It is in my book Quiltmaking By Hand, along with several other patterns. But I will tell you why there is no kit and give you hints on how to plan color schemes for any “scrappy” quilt.
First and foremost, I used more than 120 different fabrics in Day Lilies and most other scrappy type quilts I have made. It would be impossible to make kits with that many fabrics and have them at an affordable price. Furthermore, some people want to know the placement of each and every fabric. It is better to understand how to do it than to try to copy something exactly.
Selecting the Colors
Why so many fabrics in Day Lilies, for example? The base design is a hexagon which means that If you look carefully at the quilt you will see that there are three colors of lilies—reds, browns and purples. Because of the hexagonal arrangement, the lilies are arranged so that no two flowers of the same color touch, thus the three colors.
Now, a closer look reveals that each lily is made up of six petals and each petal has seven pieces. Those pieces are shaded light to dark.
Even if you used exactly the same fabric in each petal of a color you would need 21 different fabrics—seven reds, seven purples and seven browns.
Then you would have “spotlights” of colors without any blending or variance of the pieces once they are assembled.
A closer look at my quilt shows that within any one flower each petal is different. Sometimes a red petal might shade into a hint of brown or purple, or a purple might shade into a hint of red and so forth. This achieves a better blending of the colors in the final quilt.
So how do you select the colors in the first place? Rather than repeat myself and write it all here again, I urge you to watch the two following videos which explain my basic philosophy of color and how I put fabrics together. Go to the “Tips and Lessons” page of my website and choose “Design and Color.” Then watch these two videos:
“Jinny’s Color Secrets”
“Choosing Quilt Colors with the Portable Palette”
Now try these steps in selecting a palette of colors for your scrap quilt.
Select the colors you would like to use and have several values of those colors ranging from light to dark.
Add whatever additional colors you need to shade those colors together.
Make sure you have a “deep dark” fabric, an “accent” and several neutrals.
If you are uncertain where to begin, take a look at the pre-cut section of our web site.
There you will find several bundles of 30 or more color coordinated fabrics that are shaded together. Find one that appeals to you and once you have those fabrics, go to your stash and pull out any fabrics within that color range, the more the better. Here are some that I recommend:
Desert Dawn
Emerald Isle
Indian Marketplace
Moon Glow
Protea
Rainbows End
Urban Sunset
Zinnias
Indian Marketplace is a good start if you like the colors in Day Lilies. Urban Sunset is the one I used for the Urban Sunset quilt.
Take some time to look through your fabrics and make selections. Next week, I will talk about placing those fabrics in the quilt.


 In your next quilt project see if you can include neutrals in your color palette.