Posted on 18 Comments

What Kind of Needle Do You Use?

What kind of needle do you recommend for both hand piecing and hand quilting?

First let me say there are a wide variety of needles, sizes and styles available and there are no rules as to what to use. Generally, most quilters prefer “betweens”, but some use applique needles. It depends on how you hold your needle , your method of sewing and whether you do or do not use a thimble. I can tell you the kind I use and why, but you may have different preferences depending on how you sew.


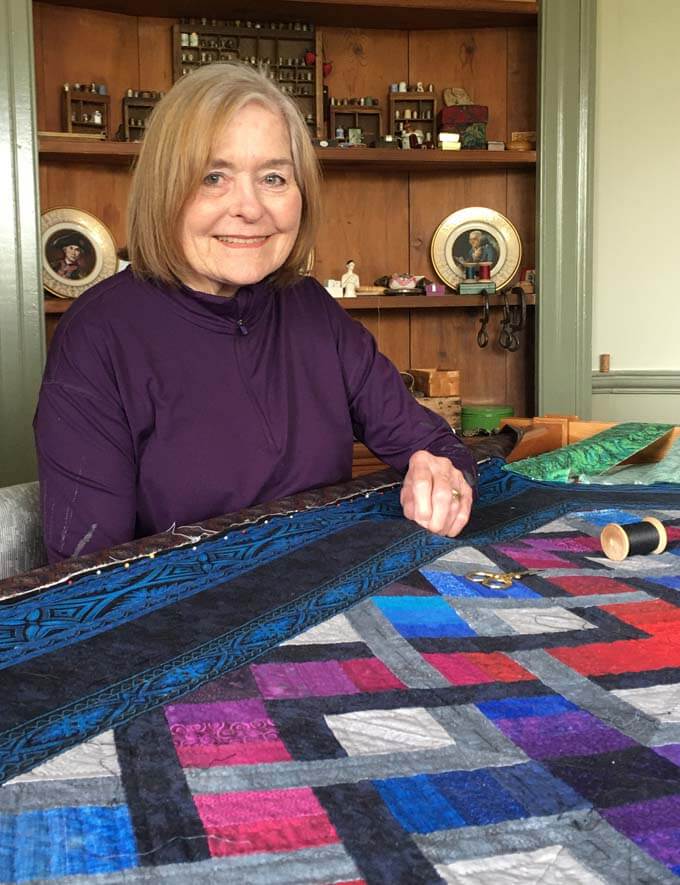
Labyrinth up close


I use a between size 11 needle for both piecing and quilting and have been doing so for all of my quilting life. Many people find the size 11s are too small for them and prefer to use a size 10. Betweens are sturdier and shorter than applique needles which are longer and finer. I put a lot of pressure on the needle when I sew and if the needle is too long or fine, I break it within the first few minutes of sewing. The sturdiness of the betweens eliminates this problem. Also I find that the smaller the needle, the smaller my stitches.

There are also differences in the eyes of needles Some brands have larger eyes and/or put a thin gold coating on the eye. The idea being that both of these practices make it easier to see the eye for threading. For both piecing and quilting, I stack several stitches on my needle at time before pulling it through. As such, I find that when the eye is slightly larger than the shaft it is difficult to pull the needle through and even if the eye is not larger, but has a gold-plated eye, that little extra metal can affect the size of the eye and puts a drag on the needle. I have resorted to keeping a pair of small nosed pliers handy to pull the needle through each time.

Recently I have discovered a new needle. It is the John James Signature collection needles. The finish on it makes it very easy to go through the fabric, the eye appears to be the same size as the shaft and it is sturdy enough to handle the abuse I give a needle without bending or breaking, I like the packaging the needles come in—a small tube with 25 needles per tube. That may make them seem more expensive, but most needles come in packages of 10.  I have been using the Signature between 11 for both piecing and quilting and have be able to put the pliers away. For me it is definitely the Cadillac of any needles I have tried.

Posted on 2 Comments

Watch and Learn Online

We often receive questions and comments from quilters about a wide range of topics and often those questions will pertain to a wider audience and seem a good topic for a blog.

We received the following comment from Rosemary:

“Please consider creating online hand quilting classes or DVD-based classes for those of us who live far away and can’t get to your studio.”

While I do have two classes coming up at the Studio next week, including Hand Quilting, I certainly understand that our website reaches quilters around the world and most of you will never be able to visit the Studio.  This was one of the reasons that I began my mystery quilt series and include video lessons with them.

We do currently have classes based on our mystery quilts both last year and this year. Our mystery quilt lessons are free to subscribers of our newsletters during the length of the class. Each newsletter has the link both to the written pattern and to the video lessons. The classes cover a wide variety of techniques that I teach, including hand and machine piecing with topics such as sewing curves, joining odd angles, applique, foundation piecing, etc. We also discuss color, quilting, using borders prints and more. Once the year is up and we go on to the next project, the previous year’s quilt pattern and videos are available for sale.

Currently, last year’s project, which covers a wide variety of techniques, is available for sale as a pattern and DVD. That project is Moroccan Mystery.

The current year’s project is Kyoto Mystery. Those patterns and video lessons are free if you are a subscriber to our newsletter. Even if you start now, in each newsletter, there are links to the previous months’ lessons and videos. 


Kits are available for both of these quilt projects, but even if you do not want to make the quilt, the video lessons are valuable on their own as they cover many of the techniques that I cover in my classes.

Our web site also has many free videos and quilt tips on a wide variety of subjects. Click here to visit our “Tips and Lessons “page.

Posted on

Having Some Fun This Spring!

We are starting to gear up for our Quilters’ Quest Shop Hop in November. All of the shops are taking sign-ups for their buses, so if you want to leave the driving to us, be sure to get your name on one of the lists. Check out the website at http://www.quiltersquest.org/

Do you want to see a little fun? Become acquainted with the shop owners who take part in the Quest and learn more about this fun-filled event by watching our video. We had great fun filming it and hope you have as much fun watching it!

Our staff had even more fun this past weekend. Elaine, one of our staffers, taught us all about boro-style needlework. “Boro” simply refers to a traditional Japanese method of mending, as well as the mended pieces themselves. The photos shown here are before and after shots of a piece that Elaine did for a bag she made. The boro stitch is essentially a running stitch but it creates wonderful texture.


Elaine's Boro project - before and after
Elaine’s Boro project – before and after


Carole and Judy enjoying the process of Boro style stitching.
Carole and Judy enjoying the process of Boro-style needlework.


Boro Needlwork Class


There was also classroom fun on Saturday when I taught a wonderful group of students hand quilting.  I set up my large quilting frame and they had the experience of quilting on both a large frame and a hoop.  I have been excited about the resurgence of hand quilting and love teaching the class.


Hand Quilting Spring Class


Spring is so beautiful! It is hard to stay inside. This year the conditions are perfect for a nice crop of morel mushrooms. I made up a recipe for stuffing for them and it turned out so good that I want to share it with you. It would be good for any stuffed mushrooms.


Morel Mushrooms Spring 2017


Enjoy the recipe and get out and enjoy the spring!

Stuffed Morel Mushrooms

3/4 cup non-fat yogurt
½ lb. Bob Evans “hot” sausage browned and crumbled
½ cup grated parmesan cheese
½ cup grated Swiss cheese
2 spring onions, finely diced
2 cloves of garlic, finely crushed

Mix all ingredients together. Remove the stems of the mushrooms and carefully wash them, leaving them whole. Using a small spoon or narrow knife, push the filling into the mushrooms, filling them as full as possible. Bake for 10 minutes in a 375 degree oven.

Posted on 4 Comments

Never a Dull Moment

This is one of my favorite times of the year. The Virginia bluebells are in full bloom along the Potomac River in Great Falls National Park. Our native redbuds are announcing spring with their brilliant violet flowers, the onions, potatoes and early vegetables are planted in my garden and we are already enjoying the early spring greens and winter onions in salads.


Virginia Bluebells
Virginia Bluebells


Redbuds
Redbuds


Early Veggies
Early Veggies


That is not to say we don’t get surprises. Last week, I was teaching my Diamonds class at my shop. We had just begun the class when all of a sudden our shop phone rang, I received one of those alerts on my cell phone and I received an urgent text message from my son-in-law in Oregon (who works on mapping at the U. S. Geological Survey)…all of these simultaneous alerts (including alerts on phones of the students) were telling us that there was a tornado warning for Great Falls and we were to seek immediate shelter.


Teaching One


Class Work Three


Class Work Two

Now we were all on the second floor of our building and could see the suddenly ominous black sky. We all hastily retreated to the basement of our building which houses the utilities. Space was crowded and we got to know each other up close and personal. It was amazing how, not only calm, but jovial the students and staff were in this cramped and dusty place.


Basement Hiding Four


Basement Hiding One


Basement Hiding Two
It was definitely cozy!


Basement Hiding Three


Student Karen made me laugh at the essentials she brought with her--her fabric and sewing supplies.
Student Karen made me laugh at the essentials she brought with her–her fabric and sewing supplies.


Within 15 minutes the danger was over and we resumed the class. The two Canadian ladies, two from West Virginia, and one from California who had traveled here for the class along with the locals were quite excited to let all their friends know about our little adventure. We did learn that several small tornados did touch down not too far from us.


Bonnie and Joan from Canada.


Susan from California.


Malloy from Maryland
Mally from Maryland

Working with diamonds is one of my favorite classes to teach and they all made great progress. It is a wonderful opportunity to work on both design and color. Here are some photos of them hard at work and some of the results.


Class Work One


Student Work One
Susan has come from California several times to take classes from Jinny and this is at least the second (or third) time she’s taken Diamonds. The quilt is the result of what she learn from Jinny before. Isn’t it beautiful?


Posted on 16 Comments

Tessellations

People have been fascinated with interlocking designs throughout the ages.  I became interested in this type of design in the 1990’s and diligently studied the work of Dutch artist M.C. Escher to try and figure out how he created his amazing tessellations. One day the light bulb went off and it all fell into place. It is so simple!


The first question is “What is a tessellation?” A tessellation is any shape that can be repeated over and over to fill a surface without gaps or overlaps.

Squares, triangles, hexagons, and diamonds are all tessellations because they can fill a surface without gaps.


Those are easy to see, but the more intriguing tessellations contain more complex, interlocking shapes. There are a few rules to follow and these rules must be adhered to or the shape will not “tessellate”.

So the number one rule is that you must begin with a base shape that tessellates. Number two is that you must give it back to the side of the shape that is equal in length. It makes a difference which side you give it back to or whether you flip or rotate the shape. Here are a few designs with this simple square and several of the patterns that can be created by merely putting the cut piece back in different ways.

Lets look at the simplest of the tessellations, the square. It is easy to see how it can repeat over and over to fill a surface without gaps. But what happens if I take a chunk out of that square? It is no longer a tessellation.


So here is the “aha” moment.  The secret to creating tessellations is this: if you take away a piece of a shape, give the piece back to another side of the shape. You will once again have tessellation because the piece you give back will fit into the hole of an adjacent piece where it was taken away.


There are a variety of ways to give a shape back and a few rules that must be followed. You can rotate the piece or not depending upon the shape used. I wrote an entire book on this called Designing Tessellations. Unfortunately it is out of print, but it is still available as an “e-book.”


I am currently working on an online class that will be offered through my website sometime in the future. It will cover all the rules, shapes that can be used, how to turn the shape into a usable pattern for quilting and much more!

I’ll keep you posted as to when it will be available but for now, why not come to the Studio and take a class in person. I will be teaching Designing Tessellations August 11 & 12.

Posted on

Travel with Me to Nepal

nepal-kathmanduI am so excited to announce that I will be going to Nepal on a tour with Sew Many Places October 14-22 this year.

We all gain inspiration for our work in a lot of different ways. I definitely know that the two years I lived in Nepal from 1968-1970 had a direct impact on the way I design fabrics and make quilts. October is the perfect month to visit and I can hardly wait to return to this incredible country with its gentle people who always have a ready smile.

nepal_claypotsOfficially the highest country on earth, Nepal is as rich in culture as it is in geography. From vibrant, cosmopolitan cities to tranquil temples, stunning landscapes to ancient architecture, Nepal has it all. It is consistently named as one of the top places to visit in your lifetime for the amazing cultural discoveries, unbelievable scenery, delicious food and some of the friendliest people on the planet.

nepal_bhaktapurWe will be participating in hands-on workshops and see lots of craft demonstrations.  As part of the trip, for those who want to participate, we also be working on a hand pieced project. If you have never hand pieced, don’t worry. I will help. On one of our trips I even taught Jim West, the founder of Sew Many Places, how to sew. He did great!

nepal-khokanaI hope you can join me on this amazing journey. If so, be ready to be inspired by the design all around, whether it is in weavings, rugs, temples, ornately carved window frames, awe-inspiring landscape and so much more.

As the Nepalis say for either hello or good-bye,

Namaste,

Jinny

Posted on 9 Comments

The Inspirations of Costa Rica

CR1What a treat it was to leave our three feet of snow and head off to beautiful, sunny Costa Rica. I’ve been back less than a week and am already suffering withdrawal.

CR2I traveled to Costa Rica to be one of the teachers in the first ever “Cocoon” run by Jim West and his company, Sew Many Places. The cocoon concept is to have four teachers, each doing one day workshops. The participants are broken into groups and take all four workshops, learning a new concept from each of the teachers.

It was great being able to reconnect with teachers I have known for more than thirty years, but haven’t seen recently. Pepper Cory, Kaye England and Judith Montano were all fantastic presenters and the students had nothing but praise for them.

Inspiration was all around!

I taught my diamonds class, Pepper did Sashiko, Kaye taught hand applique and Judith did silk ribbon embroidery. Lots of handwork which I love!

At the coffee plantation...the largest hydrangea I've ever seen!
At the coffee plantation…the largest hydrangea I’ve ever seen!

In addition to classes and lectures, we visited the Doka coffee plantation and the village of Sarchi which is famous for their beautifully decorated ox carts. There is lots in the country to love and to be inspired by. I just need time to implement some of those ideas! Stay tuned to see where they turn up in quilts and fabrics.

CR5
Creating a beautiful Ox Cart wheel

CR6