Posted on 20 Comments

Windows

Jinny’s Windows quilt, made to honor the victims of the 9/11 attacks.


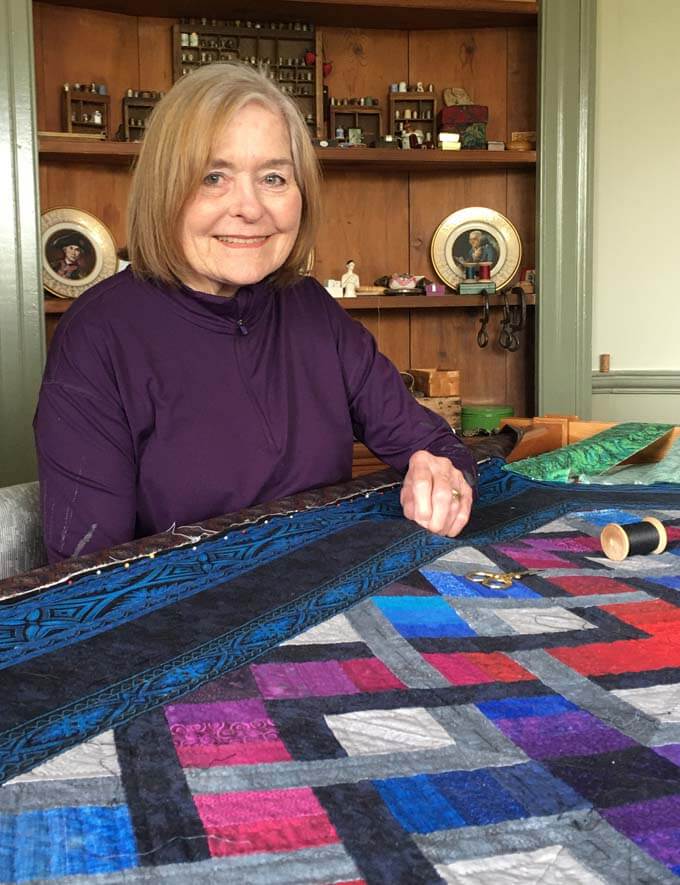
As we approach the 20th anniversary of 9/11, I want to share with you once again, the quilt I made to commemorate that tragic day. I wanted to honor all those who lost their lives on September 11, 2001. My goal was to have at least one piece for each of the victims. There are 4,777 pieces in the quilt. The one in the center is for my friend, Barbara Olson, who was in the plane that crashed into the Pentagon.

I began the quilt that week of September 11 and hoped to finish it just one year later by September 11, 2002. (I was one month late and finished it on October 11.) It is entirely hand pieced and I used more than 100 different templates and about 150 different fabrics all from collections I have designed over the years. I wanted to capture the spinning and chaos that surrounded those first days and to capture the colors I was seeing in the gray smoke and dust with the occasional, proud American flag standing tall. In the center is the Statue of Liberty which stands in New York Harbor and is repeated surrounding the center along with American flags.


In choosing the colors, I referred to an image I had been using in my color class where I took an image of the American flag, pixelated it and took out the colors using them in my quilt.


I am often asked how did I get the border print to curve? In the free tips section of my web site is a tutorial on how I achieved those curved effects. Here is a link.

And where did the name come from? I knew from the start that I wanted to call it “Windows.” Everyone was looking at windows that day – windows from planes, windows of televisions, people looking out windows from the top of the World Trade Center where sat the famous Windows on the World restaurant.

Probably, though, the most common question I am asked is if there is a pattern for the quilt and a kit available. Obviously with so many templates and fabrics used that would be impossible. Furthermore, it is a very personal quilt to me with lots of memories stitched into it.

Posted on 15 Comments

Thread for Hand Quilting

My first quilt was a grandmother’s flower garden made with Indian hand block printed fabrics. It was done with all dark colors. When it came time to quilt it, I went looking for thread. There were no quilting stores in my area in 1972, only quilting areas in other types of handicraft stores. I went into a predominantly needlework shop and asked for navy blue thread for quilting. I was told in no uncertain terms that you never quilt with colored thread. Quilting is done in only cream or white and if you ever used a different color thread and entered a competition, the quilt would be disqualified. I said I had no intention of entering this quilt into a competition and wanted a dark colored thread that would blend with the fabrics I used in the quilt. I knew quilting thread was slightly thicker than standard sewing thread and went to a decorator shop where they recommend using heavier thread for the heavier fabrics. I found a company which made a 40 weight thread that was perfect. It came in a wide variety of colors and I used it for years until it was purchased by another company and the manufacturing of the thread was outsourced to a foreign country. It was no longer the quality it had been.


I have learned a lot of my quilting lessons the hard way. When I was quilting one of my early quilts in 1976, I had chosen a poly-cotton quilting thread in white. It was a patriotic themed quilt designed for the bicentennial celebration. After about two weeks of quilting, I decided to take it out of the frame and check my stitches on the back. Much to my horror, where the quilting was done in straight lines along the grain of the backing fabric, there were small cuts that were made by the thread. The places where the quilting was done on the diagonal were ok. Polyester has a sharpness to it and it is also slightly elastic so if the thread is pulled too tightly it stretches and is even more apt to cut the fabric. I learned it is best to quilt with a thread fiber content that is compatible with the fabric used in the rest of the quilt.

I ended up taking out all the quilting I had done, replaced the backing and started over. Needless to say, that is the last time I used poly-cotton thread for either hand piecing or quilting and use only 100% cotton thread.


What color thread to use. For my early quilts, I used the same color thread throughout but as the years went by, I discovered that I liked using different colors depending on the color of the fabric I was quilting. It is not unusual for me to use three or four different colored threads in one quilt. I find I have certain “neutral” colored threads that blend with the fabrics that I often use such as light tan, grey/blue, dusty rosy red, grey/green, etc.

To wax or not to wax the thread. A lot of people ask this question. Waxing is where the thread is pulled over a piece of beeswax before sewing. I think it is a personal choice but I do not wax it. If a quilting thread is used it is already pre-waxed and my problem with waxing a non-quilting thread is I find that the waxing causes pieces of batting to be pulled out along with the thread, causing a “bearding” effect.

So much of the quilting process from beginning to end comes down to personal choices that we discover, as I have, along the way.

Posted on 18 Comments

What Kind of Needle Do You Use?

What kind of needle do you recommend for both hand piecing and hand quilting?

First let me say there are a wide variety of needles, sizes and styles available and there are no rules as to what to use. Generally, most quilters prefer “betweens”, but some use applique needles. It depends on how you hold your needle , your method of sewing and whether you do or do not use a thimble. I can tell you the kind I use and why, but you may have different preferences depending on how you sew.


Labyrinth up close


I use a between size 11 needle for both piecing and quilting and have been doing so for all of my quilting life. Many people find the size 11s are too small for them and prefer to use a size 10. Betweens are sturdier and shorter than applique needles which are longer and finer. I put a lot of pressure on the needle when I sew and if the needle is too long or fine, I break it within the first few minutes of sewing. The sturdiness of the betweens eliminates this problem. Also I find that the smaller the needle, the smaller my stitches.

There are also differences in the eyes of needles Some brands have larger eyes and/or put a thin gold coating on the eye. The idea being that both of these practices make it easier to see the eye for threading. For both piecing and quilting, I stack several stitches on my needle at time before pulling it through. As such, I find that when the eye is slightly larger than the shaft it is difficult to pull the needle through and even if the eye is not larger, but has a gold-plated eye, that little extra metal can affect the size of the eye and puts a drag on the needle. I have resorted to keeping a pair of small nosed pliers handy to pull the needle through each time.

Recently I have discovered a new needle. It is the John James Signature collection needles. The finish on it makes it very easy to go through the fabric, the eye appears to be the same size as the shaft and it is sturdy enough to handle the abuse I give a needle without bending or breaking, I like the packaging the needles come in—a small tube with 25 needles per tube. That may make them seem more expensive, but most needles come in packages of 10.  I have been using the Signature between 11 for both piecing and quilting and have be able to put the pliers away. For me it is definitely the Cadillac of any needles I have tried.

Posted on 49 Comments

Getting to Know Jinny Beyer Part II

Jinny Beyer blog

We received an email from Jan about a postcard she bought on eBay from a woman in Latvia.  Included was a photo of this card and she was wondering if we could tell her more about it. Shown here is that card. Yes, that is me from very long ago.


Many of you may know that, besides quilting, one of my other interests is amateur radio. When my father was a young boy he got his first ham radio license. To confirm a contact with another radio operator “hams” send out QSL cards. My father’s interest passed to me and I got my first license in 1957  (K6RQB) when I was in high school. I continued my ham radio activities until 1984.

I had quite some adventures along the way. Shortly after getting my license, Russia launched the first satellite to circle the earth. My father and I got up in the middle of the night so we could hear the first morse code signals the satellite emitted.

A few years after I was married, my husband, John, got a job in Nepal and right after that in India. My husband and I and our two young children went to live Nepal in 1968. I had been an active ham in the States and I got a license there.

Once in Nepal, I was one of only two hams in the country, and the only one who operated in both voice and morse code.  I was able to talk with my father almost every day. One of my frequent contacts was with King Hussein of Jordon who was also a ham. The American ambassador to Nepal was married to the ambassador of Viet Nam and the only way they could contact each other was by radio and Madam Ambassador would come to my house once a week to talk with her husband by way of a ham in Viet Nam.

Just like quilting, there is a bond among hams around the world. When my sister died and I made arrangements to fly home, obviously anyone listening knew my plans. At every single stop on the way home, a ham radio operator was there to greet me and make sure I had no trouble with my connections…New Delhi, Bangkok, Hong Kong, Honolulu and Los Angeles.

These days we are very lucky to be able to easily communicate with almost anyone, anywhere, but back then, this was quite a handy hobby to have.

To read more about this, my story appeared here on the web page for ham enthusiasts and their history here.

Posted on 4 Comments

Celebrate National Homemade Bread Day

This is a little diversion from quilting but most quilters also love to cook.

Like so many of us during this pandemic, I have pretty much been hunkering down and staying home. One of the things I have been doing is baking sourdough bread. I have talked before about my 50 year old sourdough starter that I began while living in India. I have been keeping it alive all these years and recently have been doing more and more experimenting.

Last year a friend told me about Breadtopia.com and that web site has changed my sourdough bread baking forever.

When the pandemic hit, grocery shelves were devoid of bread, so for that reason I decided to make bread more often but then flour and yeast were hard to find. I didn’t need yeast because I had my sourdough starter but I needed flour. So, I decided to grind my own flour from a variety of wheat berries that Breadtopia sells. They also sell the home mill. The benefits of freshly milled flour are many but mainly there are no preservatives and it uses the whole wheat berry which is so much more nutritious

I now use solely whole grain freshly milled flour that I mill myself in my Mockmill 100 home mill that my son gave me for my birthday.

The web site has many recipes and videos showing every step of the way and they sell all of the best products used in breadmaking, including the clay bakers and wheat berries. One of my favorite recipes is this Whole Spelt Sourdough Bread, shown below. If you are interested in trying this bread for yourself, here is the link to the recipe along with the video tutorials.


In honor of National Homemade Bread day on November 17th, I took a photo of one of my loaves and with the Photoshop trick that I showed in this blog post, I extracted the colors. I have often said that a perfect color palette for a quilt also includes neutrals.  These colors make the brighter colors stand out.

Red Fort and Snowbirds are good examples of quilts with lots of neutrals worked into the colors.

In your next quilt project see if you can include neutrals in your color palette.

If you are interested in trying this bread for yourself, here is the link to the recipe along with the video tutorials.

https://breadtopia.com/spelt-bread-recipe/

Posted on 10 Comments

Reflections

When I received this photo of my grandson holding up his stuffed toy, I didn’t know whether to cry or to be proud of his sewing skills and ingenuity. It is a sad commentary that our children have resorted to making masks to protect their favorite stuffed animals.

Who would have thought a year ago that the world would have been turned so upside-down? All of us have been affected by the Covid-19 virus in one way or another and I want to send my deepest sympathies to all of you who have lost loved ones or are having hardships because of this pandemic.

I want to also take this opportunity to thank all of you for the kind comments you made about my decision to close the JINNY BEYER STUDIO retail shop. So many of you sent such heartfelt messages about your visits to the shop over the years and how much you will miss it. I will miss it, too, mostly because of all the wonderful people I have met over the years. But we are still here.


Thanks to my excellent staff and all of their efforts, our move to our new mail order space went smoothly.  We continue to do “curbside” pickup for anyone who places an on-line order and prefers to pick it up in person.

When it is safe to travel again I look forward to seeing many of you on one of the Craftours trips I currently have scheduled for Greece, Uzbekistan and Kenya.

Remember when those of us in cold climates looked forward to “snow days” where we couldn’t go out and would have the day to do whatever we wanted? I would usually start a new project. This is a lot of snow days.

Please stay safe and start a new project. It will be good for your soul.

Jinny

Posted on 2 Comments

Watch and Learn Online

We often receive questions and comments from quilters about a wide range of topics and often those questions will pertain to a wider audience and seem a good topic for a blog.

We received the following comment from Rosemary:

“Please consider creating online hand quilting classes or DVD-based classes for those of us who live far away and can’t get to your studio.”

While I do have two classes coming up at the Studio next week, including Hand Quilting, I certainly understand that our website reaches quilters around the world and most of you will never be able to visit the Studio.  This was one of the reasons that I began my mystery quilt series and include video lessons with them.

We do currently have classes based on our mystery quilts both last year and this year. Our mystery quilt lessons are free to subscribers of our newsletters during the length of the class. Each newsletter has the link both to the written pattern and to the video lessons. The classes cover a wide variety of techniques that I teach, including hand and machine piecing with topics such as sewing curves, joining odd angles, applique, foundation piecing, etc. We also discuss color, quilting, using borders prints and more. Once the year is up and we go on to the next project, the previous year’s quilt pattern and videos are available for sale.

Currently, last year’s project, which covers a wide variety of techniques, is available for sale as a pattern and DVD. That project is Moroccan Mystery.

The current year’s project is Kyoto Mystery. Those patterns and video lessons are free if you are a subscriber to our newsletter. Even if you start now, in each newsletter, there are links to the previous months’ lessons and videos. 


Kits are available for both of these quilt projects, but even if you do not want to make the quilt, the video lessons are valuable on their own as they cover many of the techniques that I cover in my classes.

Our web site also has many free videos and quilt tips on a wide variety of subjects. Click here to visit our “Tips and Lessons “page.

Posted on 12 Comments

Learn Without Leaving Your Sewing Room

Often I hear comments from some of you that you wish you lived closer and could take advantage of some the classes that I teach. Many of you watch our class calendar and plan your trips to the Washington, DC area so that you can attend my classes. One of the most popular ones I teach is Quiltmaking by Hand. In that class, I cover all of the techniques you would need to know to tackle any hand piecing project. Those techniques include:

Supplies to have on hand
The basic running stitch
Making templates
Joining 4 points
Sewing curves
Joining 3 points
Joining 8 points
Setting in seams
Working with border prints


It occurred to me as I was proofing the DVD containing all of the video lessons for the 2017 Mystery Quilt, Moroccan Mystery, that everything I teach in my Quiltmaking by Hand class can be found in that DVD. The lessons in the DVD include all the techniques described above. You do not need to make the Moroccan Mystery quilt to learn the techniques. The DVD works as a stand-alone product for learning all the basics of hand piecing.


Speaking of a “mystery quilt,” our 2018 Mystery Quilt, Kyoto Mystery, will be launching April 7th. Subscribers to our newsletter will receive the first clue and video lesson on that day. The quilt is rectangular, 59” x 63”, and we are preparing kits in the four colorways shown here. Those kits will be available for purchase starting March 3rd. Keep an eye out for our March newsletter.

Watch this video teaser for more information on our new BOM mystery quilt.

Posted on 5 Comments

‘Tis the Season…For Quilting!

It is hard to believe that fall is past! Winter Solstice is upon us. This fall was such a whirlwind of activity beginning with visit to Oregon to see our grandchildren (and of course their parents), the Studio’s anniversary sale, then all of the preparations for our annual shop hop with Quilt Market sandwiched in. We also flew to California to spend Thanksgiving with one of our sons and his wife and are preparing to fly to Oregon for the Christmas holidays. It should be lots of fun.

A few weeks ago my 9 year old granddaughter informed me that she wants a sewing machine for Christmas along with lots of fabric…so how could I resist? She and her younger brother, Emmett,  did such a great job a year ago when they came to visit and I introduced them to the sewing machine. She took to it so quickly that I think she is ready. I got her a good beginner machine, the EverSewn Sparrow 20. I’ll keep you informed on how it goes.


Amidst all of this I have been busy preparing for our 2018 Mystery Quilt. We had such a great response to this year’s quilt that we decided on the “mystery” concept again. I have designed the quilt in four colorways and there are a variety of techniques covered. As I did last year, we will film video lessons to go along with each clue. We have listened to your feedback and will once again have a smaller quilt. This time it will be a little larger, rectangular in shape and will be suitable for a throw, lap quilt or wall hanging. We are still finalizing the lessons and patterns and plan to have the first clue in either March or April.

On another note, I have a great gift or decorating idea. As the new year approaches, many of you will be in full-on mode planning weddings and either baby or bridal showers. During the 29 years of my annual Hilton Head Seminar, one of the decisions that always had to be made was what to do about the centerpieces at the banquet tables. Depending on how large the event, centerpieces can be quite costly.


This year at Quilt Market we found the Vase and Vessels Pattern by Amy Barickman for Indygo Junction. I came home from market with the pattern in hand and made a couple of vases using border print fabrics. The technique is similar to English Paper Piecing except the fabric is fused over the Fabriflair stabilizer instead of basted over papers. As I was working, the idea suddenly hit me that this would be a perfect project for a centerpiece for an event. Use the event colors and select fabrics to match those colors. Depending on the size of your vase, put a pint or quart Mason jar inside the vase and then select flowers in similar colors, as I did in the picture above. At the end of the event, one lucky person at the table could be the recipient of the centerpiece!

I want to take this opportunity to wish all of you a very happy holiday season! If you are going to be in the Washington D.C. area over the holidays, we would love to see you. We will be closed both Christmas and New Year’s Day.

Jinny


Posted on 4 Comments

Travel the World With Us!

This summer seems to have flown by and as usual I have been busy with garden, family and quilting. Sadness for all of the extended family was the passing of my sister, Linda. She had fought a long battle with cancer and finally lost. But her amazing spirit through it all was an inspiration to everyone who knew her. I feel so fortunate that I was able to fly to the west coast in June and spend a quality week with her.  I returned in July for another week for the celebration of her life.

As usual in the summertime we start gearing up full tilt for the Shop Hop in November. This is our annual “Quilter’s Quest” which takes place for 10 days in November from the 9th to the 18th.

Each year we plan a color scheme and each shop selects a group of fabrics that fall within the range of those colors. As participants go to each shop they can purchase the swatches for $4.00 or if they spend $30 they can get them for free! This is our 2017 color palette.


Quest 2017 Colors
This year the “Quest Cuts” are eight six inch squares. We all get together and trade our sets with each other so every shop ends up with a complete set of 80 swatches. Then comes the fun part. Each shop designs a quilt based on the Quest Cuts. As you go to the shops you will receive a free pattern for that shop’s quilt.  Many of the shops offer “finishing kits” so that you can make a quilt from the pattern you like the best!

We have decided to have a “movie” theme this year and each shop has selected a movie and will enhance their shop according to the movie they select. We chose the movie Around the World in 80 Days.

It is a great event and all 10 shops have put together a fun video that tells you all about it.

In the past I have shared with you the progress of the quilt as I work on it over the summer. I wanted the design of our quilt to reflect on the movie theme. The 1956 film is about a Victorian Englishman who bets he can circumnavigate the globe in 80 days. Here is a little sneak peak of the progress.


Sorting the Fabrics


You all know how much I love shading fabrics together, so that was my first task. I needed four groups with 12 values of colors in each one, going from light to dark.


Sorting the Pieces


While the pattern for the quilt will be foundation piecing, I worked with templates, because I needed to move pieces around as I created the design. The hardest part was drafting the pattern, from there the rest was easy. Here is just a small portion of some of the pieces arranged on a design wall. It took me more than a week to get the pieces the way I wanted them and then only about a week to hand piece.

The quilt is now in my quilting frame and I work on it as I watch the Washington Nationals’ baseball games. Here is a small portion of the quilting in progress. I will share the complete design when the quilt is finished.


Quest 2017 Quilting on Quilt