Posted on 1 Comment

Hand Quilting with a Spoon

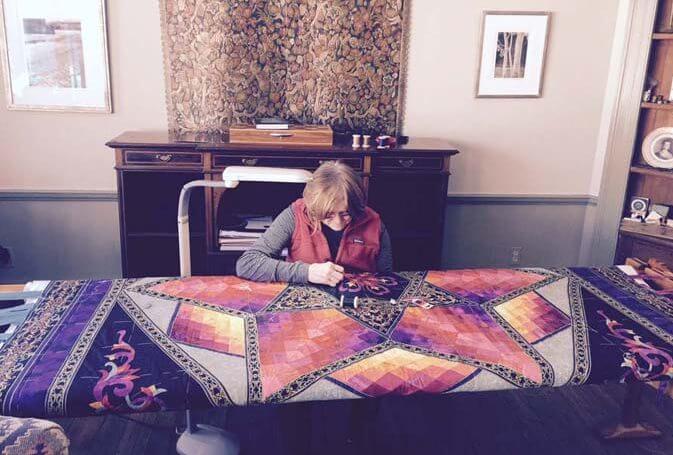
I used to use my fingers underneath the quilt frame, gently poking them with the needle and then pushing up into the underside of the quilt to bring the needle back up again. For more than 10 years, however, I have been using a spoon on the underneath side. It saves fingers and for me produces smaller and more uniform stitches. (Actually my use of the “spoon” is thanks to Gayle Ropp, a quilter in the northern Virginia area who showed me how it was done.)

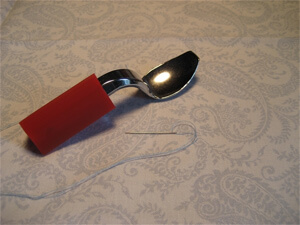
A brief video below shows you the basic process. But the idea is that you have a narrow rigid item poking into the quilt from underneath the frame. With a spoon, the thumb on the hand that is under the frame fits into the bowl of the spoon and the edge of the spoon pokes into the underside of the quilt. When the needle goes down from the top of the quilt, it hits the rounded edge of the spoon and then “glances off” the edge and comes back up again. There is sort of a rocking motion that eventually allows uniform stitches.

When I first tried this method, I quilted half of the quilt before I finally got the hang of it. Michael James has used a thimble that he flattened with a hammer to produce a sharp edge on the side of the thimble. He used this on the underside of the quilt. Aunt Becky has a product that is a metal piece that you fit over your finger and does a similar thing. I once happened upon a group of women in rural South Carolina who were quilting a raffle quilt. One older lady was quilting away so fast that I was truly impressed. I asked how she kept her fingers from getting sore and she proudly whipped out her hand from underneath the frame and exposed her thumb which had a quarter neatly taped to it. She used that quarter in a similar fashion to the spoon.

A quarter, spoon, Aunt Becky’s gadget, a pounded thimble, whatever, any sharp item poking into the underside of the quilt which the needle can glance off of may help you to produce more uniform stitches. Quilting is such an individual thing and each person has to use the method that works best.

I now use the TJ Quick Quilter spoon made specifically for quilting. It is chrome plated and doesn’t scratch so it lasts quite a long time. It has become quite popular so we now carry it in our shop and our online store.

Posted on 1 Comment

Hand Quilting

There are so many factors that can influence your success in hand quilting. This tip will focus on a few.

First and foremost, the tools and materials you use really make a difference.

Fabric
Use high-quality, apparel weight, 100% cotton fabric. If the fabric is heavy, you will get larger stitches.

Batting
I like to use 100% cotton batting. One of my favorites is Quilters’ Dream Cotton. This batting comes in several weights. I like the lightest weight, Request. The thicker the batting, the larger the stitches and the thinner the batting, the easier it is to quilt and get small stitches.

Thread
I like a pre-waxed thread made specifically for quilting. There are many brands and they now come in a wide range of colors. The one I use most is YLI quilting thread. It is a little more wiry than standard thread and produces a nice quilting stitch.

Needles
I use a between, size 11, for all my hand piecing and quilting. It is a sturdy needle and because it is so short it does not bend as readily. There are a number of needle companies and I have experimented with many of them. Frankly, in my experience, the ones made in China are not the same high quality as those made in England and Japan. I would advise you to check the packaging. If it says “packed in England” and not “made in England,” the needles are probably made in China.

My favorite needle of choice at the moment is the Colonial Needle Company’s Super Glide, Between, Size 11. This needle is made in England and has a special coating that allows it to glide more smoothly through the fabric.

Spoon
I can’t quilt without a spoon. You may wonder what that is.  When quilting, you need a hand underneath the quilt frame to receive the tip of the needle and push it back up again. After a while your finger gets really sore. There are various devices to use under the frame that will guide the needle back up. Some thimbles have sharp ridges around the top for just this purpose. Aunt Becky’s Finger Saver is another device.

A (quilting) spoon and pliers — two hand-quilting essentials for Jinny.

Once, I encountered a group of older women around a quilting frame. One of them was quilting up a storm and I asked what she used underneath. She proudly held up her thumb where she had a quarter taped. She was using that to guide the needle back up.

I have tried many different things, but my favorite is TJ’s Quick Quilter Spoon. It saves many sore fingers.

Pliers
When quilting, sometimes if you have stacked four or five stitches on the needle it is difficult to grab the needle and pull it out. I use a small pair of pliers for this purpose. I just keep them on my quilting frame and grab them when needed.

Thimbles
I never sew without a thimble. I have written two blogs about thimbles and recommend you read, Put A Thimble on It and Thimbles, Part II – My Favorite Thimbles.  These blogs cover how to choose a thimble and what my choice is.

Quilting Frame
I have saved the most important for last. To get good even stitches you must use some type of frame or hoop.  It is the same as doing embroidery. Without a hoop, the work is either too loose or too tight. I can’t stress enough the importance of this.

My book, Quiltmaking by Hand, has a whole chapter on quilting, designs for quilting, how to put a quilt in a frame or hoop, and so much more. If you have an interest in hand quilting, this book would be useful for you.

And Finally, Practice!
If you have the right fabric, batting, tools and some sort of frame, the best way to practice your quilting is to put a quilt in a hoop or frame and start quilting. The first stitches will probably not be to your satisfaction, but you will find that you will improve as you keep stitching.

I was very disappointed when I started quilting my first quilt. Here is a close up of how those first stitches looked and another several months later when I was achieving smaller and more even stitches.

My first stitches were only four per side.

After four months, my stitches were better — seven per side.

By my third quilt, I was very comfortable hand quilting.

Like everything else, it takes time to develop your quilting skills, but I promise that good tools will make all the difference!