Posted on

Working with Diamonds

60° diamonds are extremely versatile and quilts made with them are great for hand-piecing projects.

Jinny likes to assemble the diamonds into a base unit, decide where to put lights, and go from there. The unit for Red Fort is one of the simplest, as it has only four diamonds—two lights and two darks.

Decide what size diamond you want. So many people nowadays are collecting 2½” strips and like to cut their diamonds from those strips. That is the size that was used for Red Fort. The 60° degree Perfect Cut Diamond Ruler makes cutting the diamonds a breeze. Click here to learn about using the 60° ruler.

Start off by making stacks of units. For a scrappy effect, when making the units, use different fabrics in each of the four diamonds. For the darks, Jinny usually make one of them darker than the other, and does the same for the lights. Sometimes she will mix it up, using a medium fabric as a light in one unit and as a dark in the other.  As long as there is contrast between light and dark in each of the units it will work out. Jinny’s advice? Don’t try to think ahead. Just make the units!

Once you have a lot of units, lay them out into larger sections. Each of these large units will have 12 of the smaller ones. Start by making a star using six of the diamond units and then fill in with the remaining six around the edge.

Now make several of these large units depending on how big you want the quilt. The one shown here has 10 full units, four side units which are half of the larger one, five top/bottom units, and two corners (one the reverse of the other.)

The side, top/bottom and corner units use additional shapes (partial diamonds) to finish off the edges. Those shapes, for 2 ¼” or 2 ½ diamonds, are included in the free download, Red Fort Templates.

A quilt of this size, including the border shown, is 66” x 78”.  A smaller quilt with five large units (two in the top row, one in the middle and two at the bottom) with the border will finish at 49” x 64”.

For the border, Jinny used a border print fabric and an accent fabric. The narrow stripe from the border is first, then an accent border, then the wider stripe from the border fabric to finish it off.

She used the Golden Gauge Calipers to determine the width of that middle, accent border.

And when it comes to putting the borders on the quilt, see our tip for achieving perfectly mitered corners — without math — when working with a rectangular quilt.


Although the Java pixie that Jinny used is no longer available, you can try this design with our other batik pixie rolls which can be found here. In addition to the Pixie Strips, Jinny has added the following fabrics:

1/2 yard each of a coordinating batik for blocks and for the inner border
2¼ yards of fabric for blocks and the outer border

Posted on

Tessellated Designs

Many people ask, “what is a tessellation?” A tessellation is a shape or combination of shapes which will indefinitely cover an area without any gaps or overlaps. Even though we tend to think of tessellations only as interlocking motifs, any quilt block that repeats itself can be considered a tessellation. But it is interlocking patterns that are intriguing, and once you know how to create them, a whole world of design will open up.

Jinny has made several quilts based on tessellating designs.

Day Lilies

Soaring High

Rhapsody

Squares, triangles and hexagons are tessellations since, when placed side by side, they will cover an area without any gaps or overlaps.

If you take a chunk away from any of these shapes, they are no longer a tessellation because the shapes will not fit perfectly next to each other — there will be gaps where the pieces were taken away.

The secret to creating tessellations is this: if you take away a piece of a shape, give the piece back to a another part of the shape. You will once again have tessellation because the piece you give back will fit into the hole where it was taken away.

Jinny’s book, Designing Tessellations: The Secrets of Interlocking Patterns (now out of print but often available used on amazon.com or ebay), describes this simple process of creating tessellating shapes. It covers how to create geometric-style interlocking patterns suitable for patchwork, as well as more realistic-type tessellations which would be suitable for all types of surface design.

Posted on

Soft-Edge Piecing

In traditional patchwork designs, fabric is cut to fit within the various shapes of the block pieces. As a result, we often cut into a beautiful portion of the fabric, “forcing” it to fit within that shape, and possibly spoiling the design of the fabric. Jinny began to wonder what would happen if we let the design of the fabric dictate the boundaries of the shape.

Jinny’s quilt, Renaissance Garden, uses this technique.  (The pattern includes an instruction sheet on soft-edge piecing.) Watch the video to learn how to create the soft-edge pieces and get some great ideas for using the technique in your quilts.
Download the free Renaissance Garden pattern.

Posted on 3 Comments

Fragmenting: A Whole Quilt Design from a Single Block

I often use fragmenting when designing quilts. The concept of fragmenting a traditional patchwork block is not new. It has been used for centuries with the traditional Lone Star design.

In the Lone Star design, each of the diamonds of a traditional eight-pointed star has been broken up into the same number of smaller diamonds.


The diamond units in a traditional eight-pointed star block (left) can be fragmented (center). We know this “fragmented” design as the Lone Star quilt. You can fragment the background squares and triangles, too. That’s what I did for my Stained Glass Star quilt!

Traditionally, each round of diamonds from the center outwards is the same fabric. I used this same idea to create the quilt, Star Sapphire. Each of the diamonds has been broken into eight divisions per side, but the coloring is different from that of a  traditional Lone Star. I treated each large diamond unit as being made up of four smaller diamonds, and then shaded the patches within each of those four diamonds to create a non-traditional effect.


In the traditional lone star design (right) the colors radiate out from the center with each round of color the same in each diamond unit. In Star Sapphire (right), I switched up the color shading to get a design with a more faceted look.

When I developed the idea of fragmenting an entire design, I still started with a traditional quilt block.  However, then I broke all the shapes in the design into smaller versions of that same shape. Each shape had the same number of divisions. In addition, when coloring the fragmented shapes, I shaded each of them from light to dark. Let’s look at a recent example.


I developed Rajasthan from a traditional design called Beginner’s Delight. Below you can see the original design, the fragmented version and finally the quilt. The larger sized quilt uses four of the blocks. And rather than fragment the central square, I opted to use a border print square. (You can learn how to do this in my Creating Border Print Squares lesson.)

The Rajasthan wall-sized quilt is really just one big block!

The larger version of Rajasthan is four blocks sewn together. A border print triangle is used in one corner so that when the quilt is assembled, you get a center medallion.
How to Fragment Your Own Block

Fragmenting is fun.  It gives you the opportunity to really play with color and shading, or simply to use lots more fabrics. When selecting a design, a simpler one will best.

To fragment the block:

  •     Divide each side of each shape into the same number of equal divisions.
  •     Draw parallel lines from the sides of the shape to one of the other sides.
  •     Draw the second set of lines.

With a triangle, you need a third set of lines. Sometimes I find this last set makes the shape too busy and I opt to eliminate it.


Because a triangle has three outside lines, none of which are parallel, to fully fragment the shape you need to draw three sets of lines (Triangle 3). However, you could decide to just stop at two sets of lines as in Triangle 2 and use diamond-shaped patches to fill the unit. You might also decide to remove a different set of lines as in Triangle 4: in this example, you’ll fill the shape with square and half-square triangle patches.

Shade the units from light to dark. Try shading in various directions until you find the one you like best.


Different light-to-dark progressions can make a big difference in how your quilt will look. Having the lightest fabric in one unit against the darkest in another unit can create a nice glow. Take another look at Star Sapphire to see how this can work.

For more detailed information on fragmenting, coloring fragmented designs and creating templates for each of the shapes, see pages 45 to 48 of my book, The Quilters Album of Patchwork Patterns.


For other examples of my fragmented quilt designs, take a look at Mayflowers, Summer Lily,  and FabergéAll of them are free pattern downloads!

Posted on 1 Comment

Drafting Quilt Blocks

While working on my first book, Patchwork Patterns, I kept finding designs that were based on a 5 x 5 grid. Since I did not know how to fold a piece of paper to get five equal divisions I set them aside and was not going to use them. But before long there was a stack of those designs. Someone had shown me how to fold a square and get a five pointed star, so it seemed logical to me that there must be a way to fold a square and get five equal divisions. I sat down with a stack of squares and started experimenting and finally found a way!

The following day I was leaving on a trip and figured the airplane ride would give me a good opportunity to write down what I had discovered. Working with a paper napkin, I folded and wrote, folded again and wrote some more until all the steps were explained.

Finally a man sitting next to me asked “What are you doing?” I proudly answered that I had just figured out a way to fold a square and get five equal divisions and proceeded to show him. He looked on with interest and when I was finished with my demonstration he said, “That is very interesting, but there is a much easier way to do it.” He showed me in 30 seconds how easy it is. I was dumbfounded and have used the technique ever since, not for just five divisions, but for any number of equal divisions. Here it is:

If I want to divide a 7¾” square into five equal divisions, it would be hard to do the math and count off all the tick marks.  If my square were 10 inches then it would be very easy to do. I would simply mark a division every two inches. Well, all you have to do is to pretend that the square is 10 inches.

Step 1. Angle the ruler across the square so that zero is on the left side of the square and 10 inches falls on the opposite parallel side.

Step 2. Make a mark every two inches and you will have five equal divisions.


Step 3. Using a ruler or triangle with a 90 degree angle, line it up to the dots and draw the lines as shown

Step 4. Turn the paper 90 degrees and repeat steps 1-3 to get the lines going in the other direction. It is best to use a different colored pencil for the dots so that you do not get the first set of dots mixed up with the second.

For a more detailed explanation of this technique see The Quilter’s Album of Patchwork Patterns, pages 29-32.

Posted on

Computer as a Color Tool

Often we see a photograph, a flower, leaf or other image that has breathtaking colors. We may want to try to recreate those colors, but never seem to quite get it right. The two images shown here are of the American flag. The first image is the regular photograph. The second one has the individual colors in the photo selected.

We would say there are three colors in the flag — red, white and blue. Yet, when you see an American flag blowing in the wind, your eye perceives so many more than just three discrete colors.  The play of light and shadow and the transparency of the flag translates our glorious red, white and blue into dozens of shades and hues.

I often use my computer to find the colors in an image such as this and then work with those colors in a quilt project. This is how I do it using Adobe Photoshop. Other image editing software will work in a similar way.

  • First, if I’m not using a digital image, I scan the picture or object at a very low resolution (the dpi or pixel setting). When I want to see individual squares of colors, I set the dpi to a very low number.
  • If you already have an electronic image, open it in your photo editing software and set the resolution to a very low number such as 8 or 10 dpi.
  • Next, use the eye-dropper tool to select a color from one of the squares.
  • Then, make a selection box below the image and use the paint bucket tool to fill that selection with the color. I continue making boxes and filling them with the colors in the image.
  • Finally, I rearrange the boxes in a shaded order and I have a palette of colors to refer to when selecting fabrics for my project!

There are also some wonderful automatic “palette generator” tools on the web. They will pull colors from an image that you upload from your computer. Use an online search engine to find automatic color palette generator or try this one:

http://www.cssdrive.com/imagepalette/

Posted on 2 Comments

Color’s Impact on Design (Stony Creek)

During a Jinny Beyer seminar session on color shading, participants created full-sized quilt mock-ups from strips of fabric pasted to paper foundations.

Each mock-up is a variation of a single, original Jinny Beyer quilt design called Stony Creek. Each mock-up uses the same fabrics and the same quilt design. However, the fabric placement varies in each version.

Jinny explored this color exercise, and how shading creates special effects, in the May/June 2010 issue of Fons & Porter’s Love of Quilting magazine.

Posted on 2 Comments

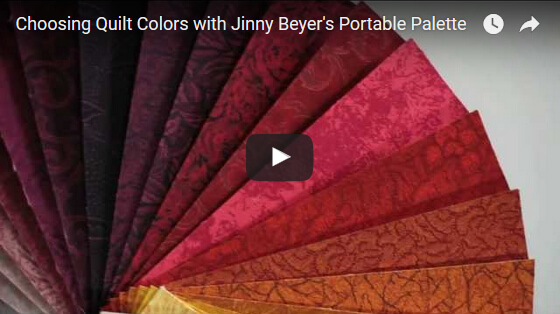
Choosing Quilt Colors with the Portable Palette

Jinny’s Portable Palette is an indispensable tool for choosing colors for your quilts.

It’s very similar to a painter’s fan deck of colors. The Palette includes a 1¾” x 7″ swatch of each of the 150 fabrics in Jinny’s Palette Collection. The fabrics shade beautifully from one color to the next, making it easy to find a range of colors that will work with your focus fabric, inspiration photo or color scheme.

Watch as Jinny shows you how to use the Portable Palette in variety of ways that are sure to help you choose the colors for your next quilt. And get more details on the Portable Palette below.
More on the Portable Palette