


This is a parent category for the website.
Jinny designed her Perfect Cut Ruler to make it quick and easy to cut perfect 60° diamonds and equilateral triangles — for six-pointed stars, Tumbling Blocks, Thousand Pyramid quilts and more.
Watch as she demonstrates how to use the ruler to cut strips of the desired width, cut out the diamond or triangle patches, trim points and mark seam intersections. It’s a big time saver!

Since discovering the Apliquick tools and technique, Jinny has adopted it as her preferred way to appliqué. Here’s a quick overview of how she does it.

Copy the design onto the fusible, and cut the shape out directly on the line.

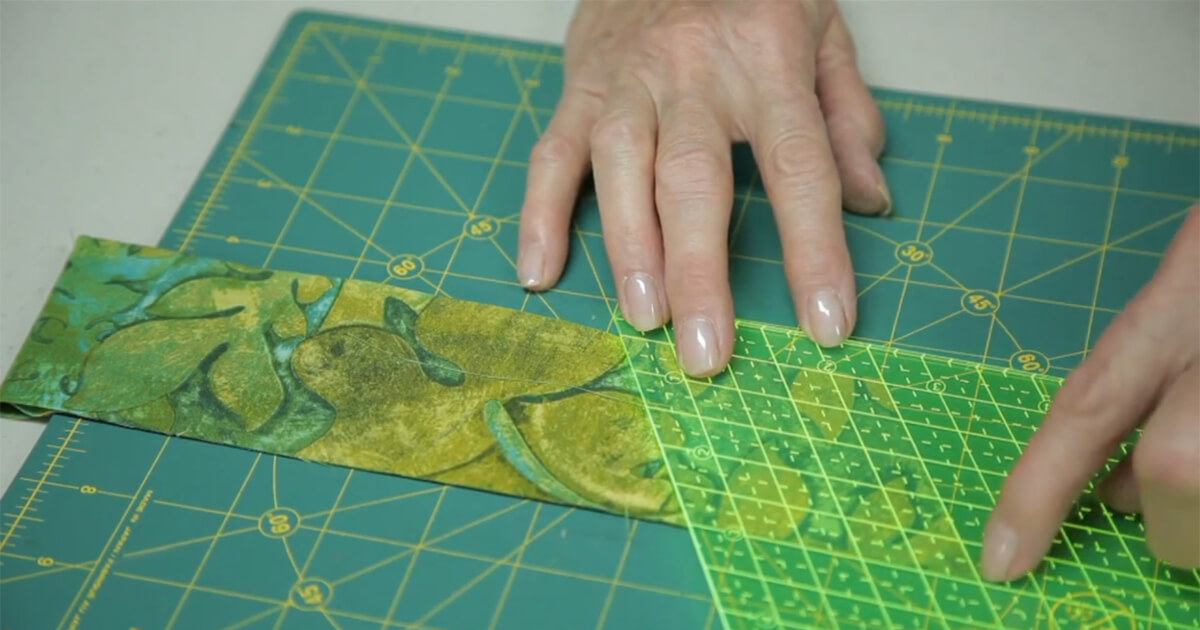
Iron the fusible onto the fabric. (Make sure that the inward curves are placed on the bias.)

Cut out the fabric leaving 3/16” for seam allowance.

Place the fabric fusible side up, hold it in place with the two-pronged tool and put the Apliquick fabric glue along the seam allowance overlapping the fusible.

Hold the fabric with the pronged tool and turn the edge over onto the fusible with the pressing tool. Make sure that the fold comes right at the edge of the fusible.

Allow to dry, then arrange on background.

Occasionally, your turned edges will not be as smooth as you would like them to be.

Using the pointed tip of the beveled-edge tool, gently press on the edge that needs smoothing.

On small curves, it is necessary to make many tiny pleats at the curve using the pointed end of the beveled-edge tool. If you find that it is not smooth enough, use the pointed tip at the fold to smooth out any bumps and ridges, then press it down with the beveled edge until flat. Now you have a perfectly smooth curve!
To give yourself the best chance for blocks that lie flat and smooth, consider the fabric grainline when positioning your patches for cutting.
Wherever possible, plan to have the fabric’s lengthwise grain (along the selvedge) or crosswise grain (from selvedge to selvedge) fall along the outer edges of each section in the unit, block, or quilt. This eliminates possible distortion in the block.
Watch Jinny’s two-minute video for a quick explanation of grainline and some tips when rotary cutting patches.

Not all patchwork patterns can be assembled with continuous straight seams; sometimes a piece has to be set in. The most important consideration when setting in pieces is this: you must stop all stitching at the place where the seam allowances on the pieces cross, thus allowing an opening so the fabrics can be set in smoothly and without puckers.
Watch the video to see Jinny demonstrate the technique for those who sew by machine or by hand.

Many quilters shy away from sewing curves. While it’s true that you can’t sew curved seams quite as fast as you can straight ones, with a little bit of care, you can achieve beautiful curves in your blocks.
When sewing together two curved pieces together such as the shapes shown here, mark the halfway spot on each of the pieces, as well as the places at the edges where seam allowances cross (indicated by dots.)


With right sides together pin the two pieces together at their mid points.

Next, pin them at dots where the seam allowances cross at the edges.
With the pins in place, fold each section in half to find the quarter points on both pieces. Pin the quarter points together. Pin the rest of the edges together, easing in fullness between the pins at the quarter and halfway marks.
Stitch the pieces together being careful to ease in any extra fullness. Press.
Machine Sewing Curves. Slow and steady is the key to making smooth curves when sewing by machine. Stop at each marking to adjust the fabric for the next section, matching the fabric edges and smoothing the fullness in the top fabric away from the stitching line ahead.
Some quilters find that reducing their stitch length a little gives them more control.

Piecing a Lone or Radiant Star with its many 45° diamonds can seem like a daunting task. However, with strip-piecing techniques and a few tips we think you will find this much easier than expected.
Our staff pattern tester, Diane, has given us 10 tips to make this process go smoothly.

1. Offset the strips when sewing to use as much of your fabric as possible. Don’t be worried when your strip-sets have a small curve to them.

2. Draw a straight line on your ironing board. (Ours in the Studio has a pattern on it so we covered it with muslin first.) We’ve drawn a second line at 90 to the first and drawn tick-marks at 1-inch intervals along each line.

3. Since she is a hand quilter, Diane presses her seams open. She also finds it easier to match seams this way.

4. Line up the 45° angle line on your ruler with the raw edge of your strip set to trim.

5. Rotate the strip-set and cut your segments to the appropriate size. Check the 45° angle every few cuts and trim if necessary.

6. Diane likes to trim off the points before joining the segments. Line up the first two strips to see where you need to trim.

Align the marks on the trimmer with the raw edges and trim.

7. Take your first two segments and place them right sides together. Mark your ¼” seam allowance on the right side of the bottom segment and on the wrong side of the top.

8. Not everyone is a pinner but, in this case, we recommend it. Place a pin on the mark one thread away from the seam allowance on the top, going through to the same side of bottom segment on the drawn line.

9. Hold the pin straight up and down and pin just next to the aligning pin, taking a small bite of fabric.

10. Here’s how it should look.
You are now ready to sew! Follow these tips now and when joining the pieced diamond units together.
For more information, check out this wonderful video on the McCall’s Quilting, showing how to make Jinny’s Lone Star Salute quilt.

Some blocks that look like they require an inset seam can actually be constructed using a much faster technique: a partial seam. Let’s see how it works.

The Harlequin Charm (left) and Holiday Memories Table Runner (right) blocks both use partial seams.
Sew the first patch to the center, beginning from roughly the middle of the center patch and locking your starting stitches. If you are machine stitching, you can sew straight off the end of the fabric as you usually do. Finger-press the seam open.

The first patch is sewn to the center with a partial seam.

The next patch can then be sewn, as is usual, to the unit made with a partial seam.
By sewing the partial seam, you now have a complete side to which you can sew the next patch. Sew, finger-press the seam open and continue to the next patch. Continue sewing patches in this fashion. When sewing the last patch to the center, be sure to fold the partially sewn patch out of the way.

Add the subsequent patches normally.

Keep the first patch out of the way when sewing the last patch to the center.
After sewing the last patch to the center, you can finish stitching the partial seam to complete the block.
Look for blocks where patches seem to “pinwheel” around a center; they are often good candidates for this technique.

The Harlequin Charm quilt uses this technique . . . and the pattern is a free download. Why not give it a try? Just click on the image for more information.


Jinny designed her Perfect Piecer for those who sew by hand or machine. It’s ideal for marking seam allowances and seam intersections so your patchwork fits together beautifully. Watch as Jinny puts the Perfect Piecer through its paces. For more details or to order, click the link below.

To make templates, place semi-transparent template plastic directly over the pattern and trace the pieces onto the plastic, drawing any identification marks and grain lines. Jinny Beyer Studio patterns include seam allowances and typically show the sewing line as well.

Templates usually include the sewing line, the grainline arrow, plus any additional marks or notes that help in the sewing or identification.
Eventually you can learn to eyeball the quarter-inch seam allowance, but if you need a guide for sewing, trace the sewing line from the pattern piece onto the template. Put small holes in the template (a 1/16″ hole punch works great) where the seam allowances cross at the corners, then in as many times along the seam line as you think are necessary to give a proper sewing guide.
After lining up the edges of the pieces and pinning them together, place the corresponding template on top of the piece facing you and mark small pencil dots directly through the holes. You can then sew “dot to dot”. This method will save a lot of time as you do not have to mark the seam line on each piece, but only on the piece facing you as you sew.
Machine Sewing
If you have a ¼” sewing foot, it’s easy to sew an accurate quarter-inch seam. Using the template or Jinny’s Perfect Piecer to mark the corners helps ensure your accuracy and makes sewing inset seams or miters much easier.
Jinny now offers her own Template Film for making templates as described here. However, they can also be run through a laser printer — perfect if you have an electronic copy of a pattern!