My Windows quilt appears to have border print circles in several places.
The curves are actually an illusion: the four different circular bands in the quilt are made up of small wedges of fabric that have straight sides. However, by dividing the bands into pieces, you can get the appearance of curves. the quilt center is shown here.

Jinny’s Windows quilt, made to honor the victims of the 9/11 attacks.
Let’s look at the center of the quilt first. The center block, Liberty’s Crown, appears to be a circle. However, look at the line drawing: the very center “circle” is actually a polygon with 16 sides, and the circular “frame” around it is actually made from 16 wedges.
All the sides of the wedges are straight lines, but because the lines are quite short, when the wedges are sewn together, the section appears curved.

The frame around the center image appears circular but is actually made from 16 wedges.
There are four bands of “curved” border print fabric in the quilt. The smallest band (the one around the center patch with Lady Liberty) is made from 16 wedges; the outermost band is made from 128 wedges!

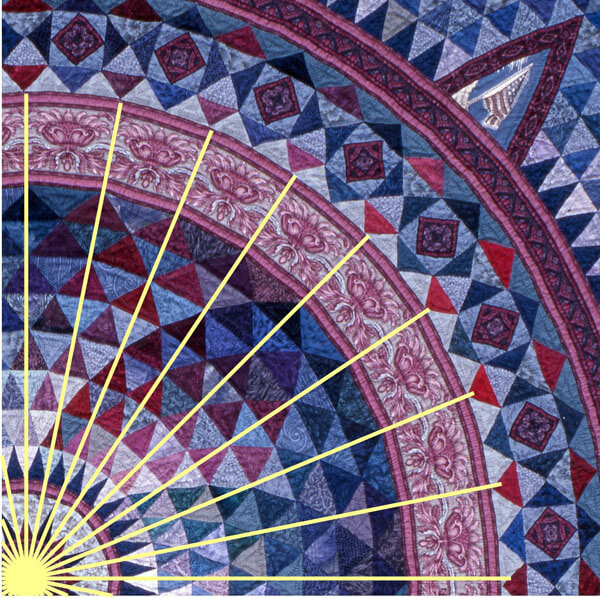
This band in the quilt was divided into 32 sections. One quarter of the quilt center is shown here.
Here’s how you can convert a circular band to use this technique.
1. Divide the band into segments. For the example below, I’ve used just eight segments rather than the 32 in the quilt. (The larger the circumference of the band, the more segments you’ll need to maintain the illusion of curves.) Using a computer makes this super-easy, but you can also use a protractor to determine the position of the angled lines.

Divide the circle into equal sections.
2. Replace the curved lines between your angled lines with straight lines. (Remember that this will change the shape of the patches above and below the band, too.)

3. Trace over the wedge to get your finished patch size and add a ¼” seam allowance all around.

Make the template, adding the seam allowance to the outside.
This technique will work for any fabric, but because I wanted to use border print fabric, there were two more things I had to do.
First, I wanted the band to include a printed stripe around the inside and outside of the band because I like the way this frames an element in a quilt. So I needed to make sure that the band in my quilt was the same height as the border print I had selected.
After drawing the straight line between two angles on the inside circle of my band, I drew the second line the width of the border print (4 ½”) above the first. After adding the seam allowance around the edges, my template was the perfect size for cutting the border print.

The height of the wedge should match the width of the border print stripe plus seam allowances.
Secondly, for the design to flow smoothly around the band, I needed to cut identical fabric patches, all of which had the same mirror-image element centered in the patch. (The blue line on the template indicates the mirror image.)

The template is used to cut identical wedges from the border print fabric.
Creating curves with border print fabric isn’t something you can accomplish “lickety-split”, but it also isn’t as hard as it might seem. It just takes some time and patience.
For even more information, see my book, Quiltmaking by Hand, pages 139-141 and 154-155.